Build a Pop Art Maker with Supabase + Next.js
Introduction
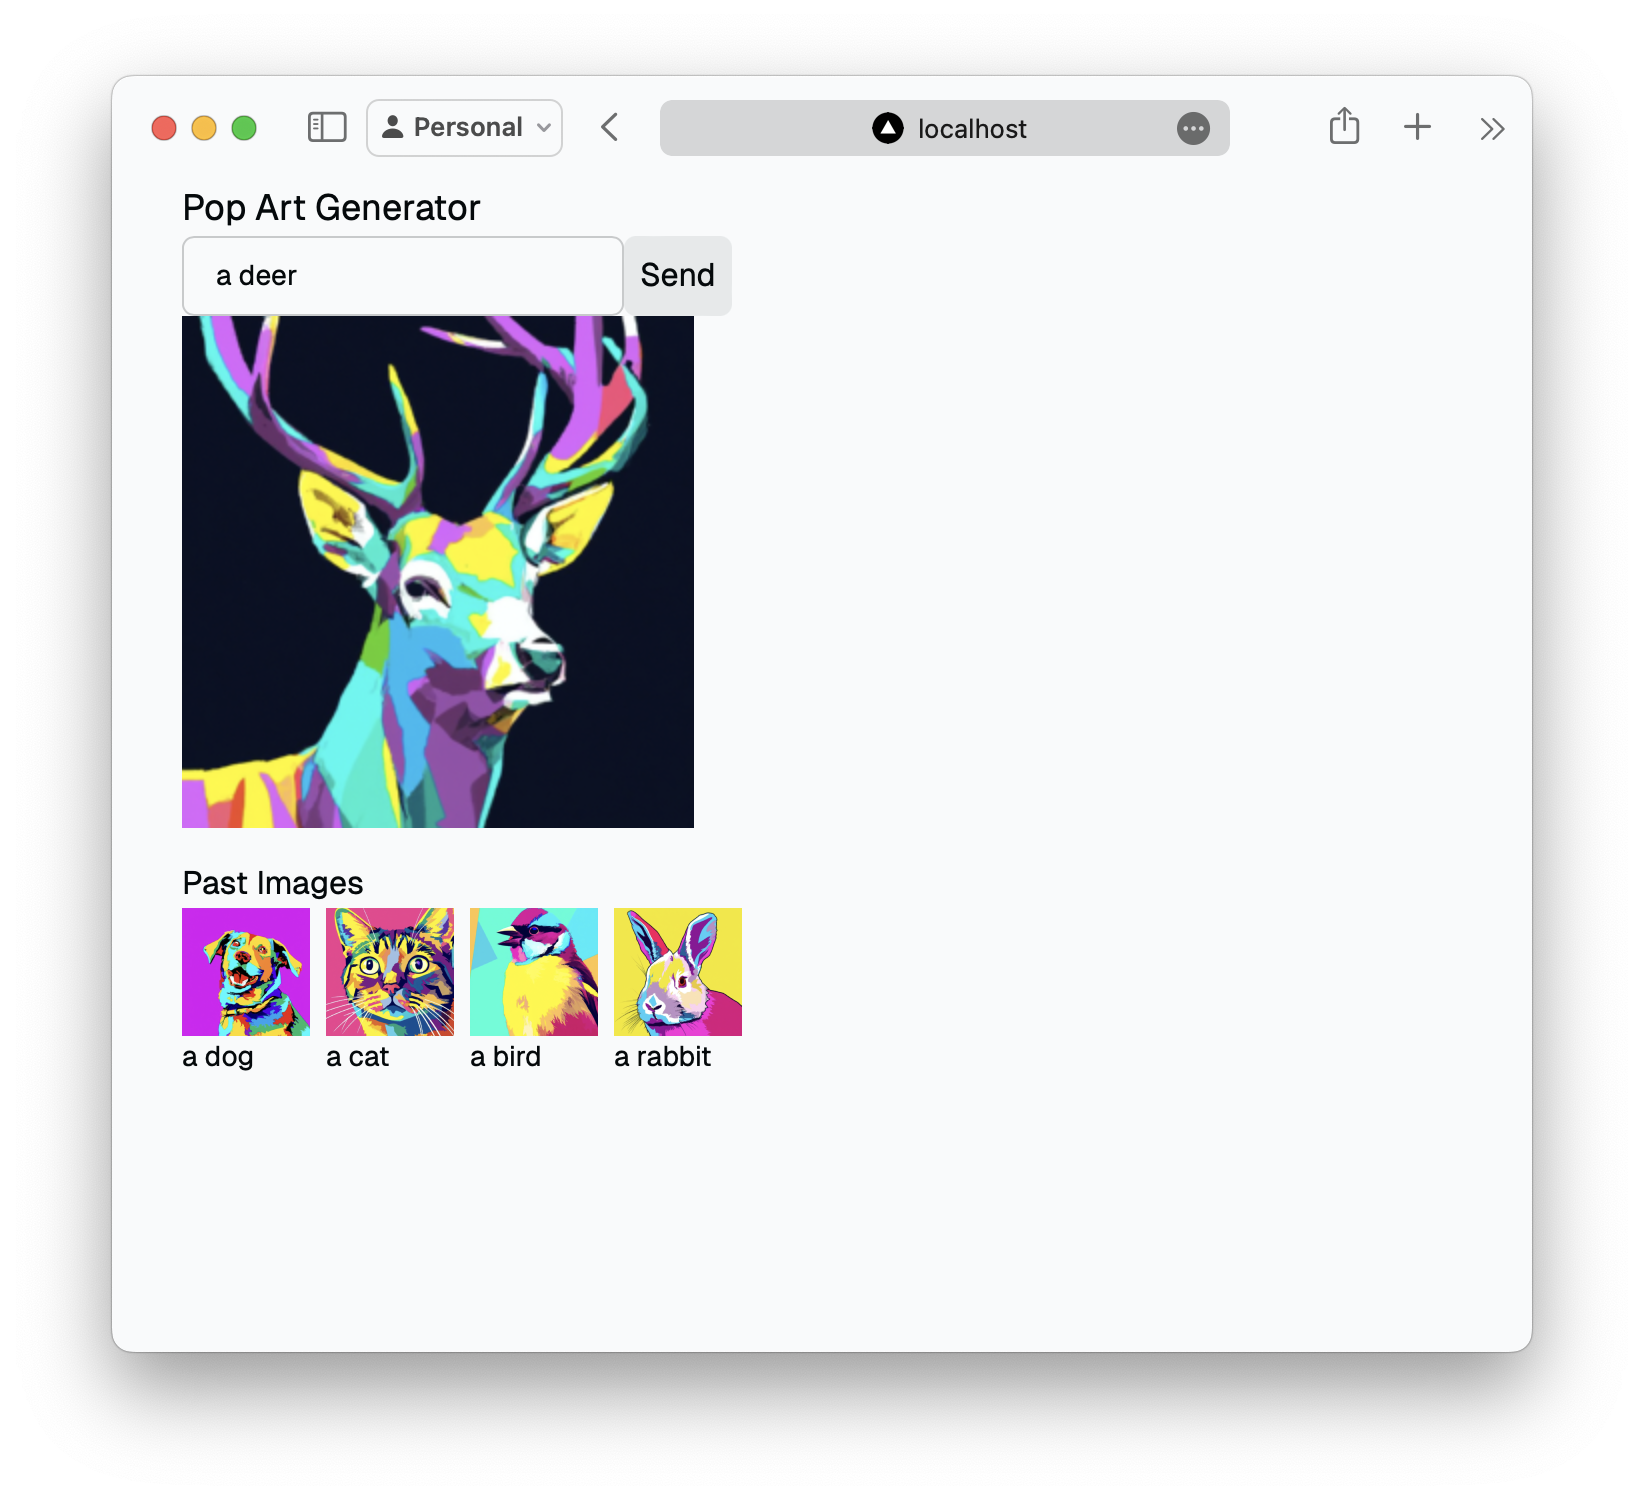
In this tutorial, we'll guide you through building a pop art generator using Next.js and Supabase. View completed example on GitHub.
Prerequisite
Before getting started, ensure you have:
- A Supabase account (the free tier is sufficient).
- An OpenAI developer account with credits.
Setting Up Your Supabase Project
-
Create a Supabase Project
Log in to your Supabase account and create a new project. You can choose any project name and password that you prefer.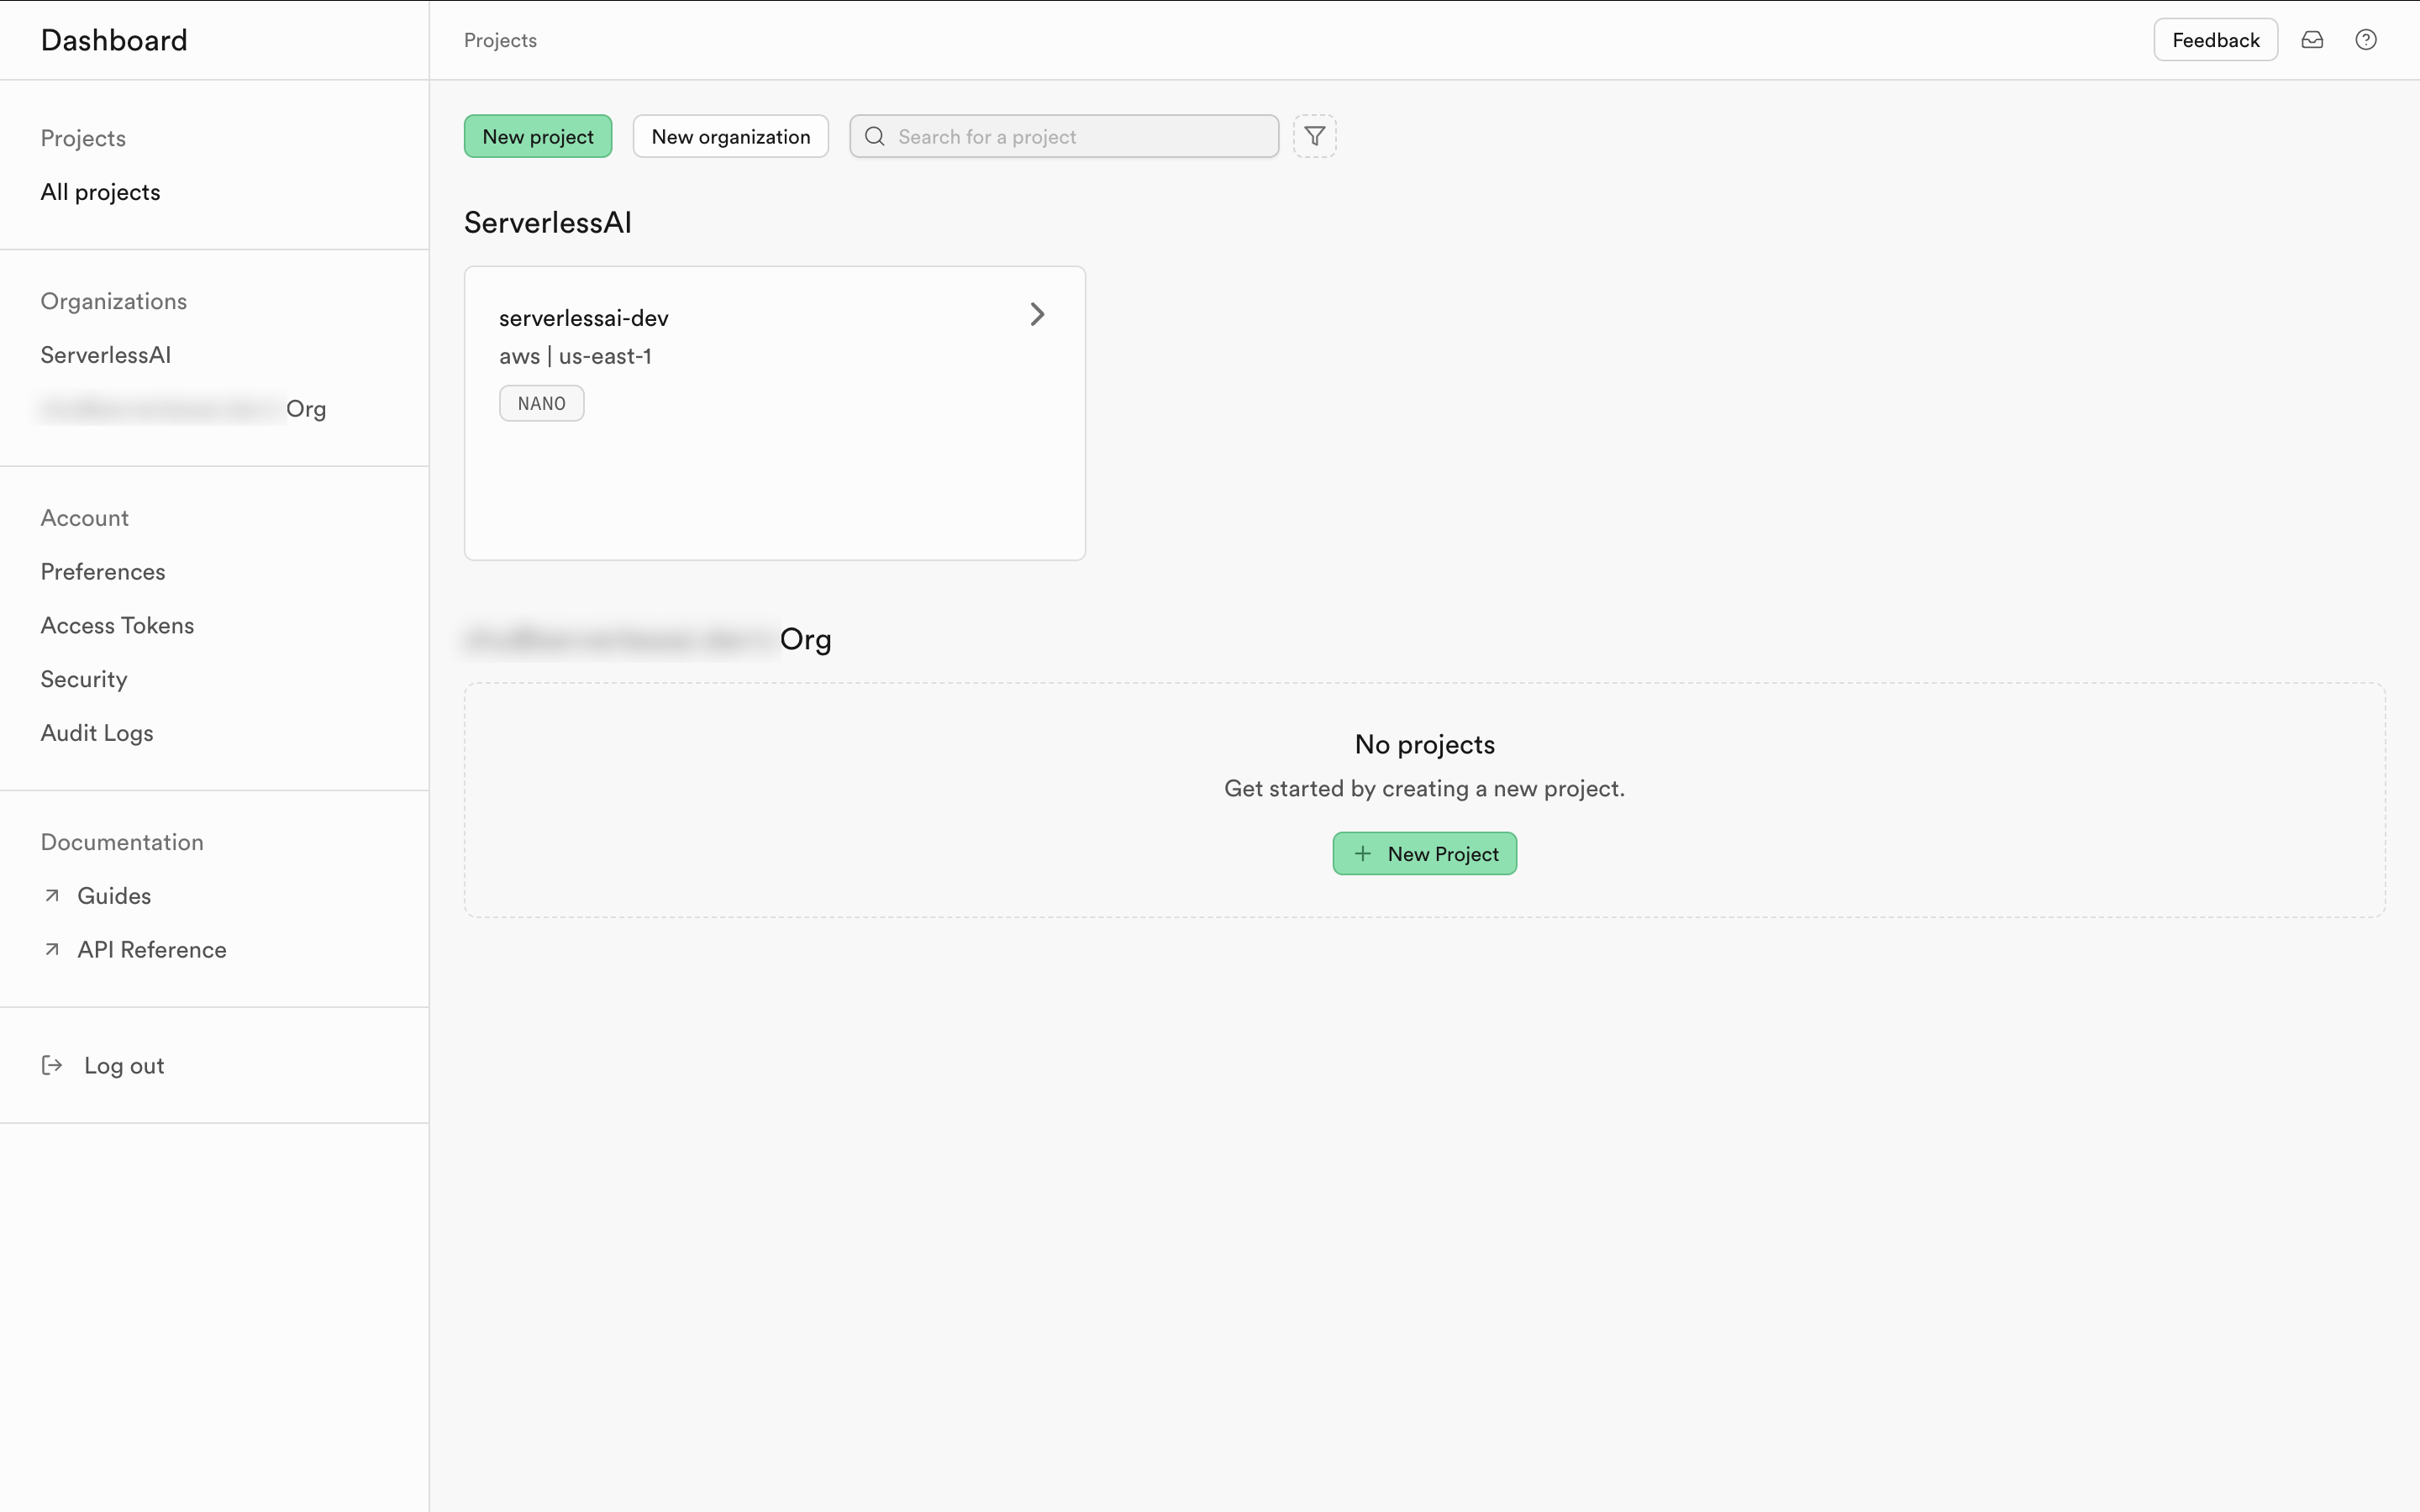
Once your project is created, you will see the project dashboard.
-
Take Note of Your Keys
After the project is set up, make sure to copy the necessary keys. You will need:- The
anonpublickey and the project URL for your Next.js project. - The JWT Secret to configure your ServerlessAI project.
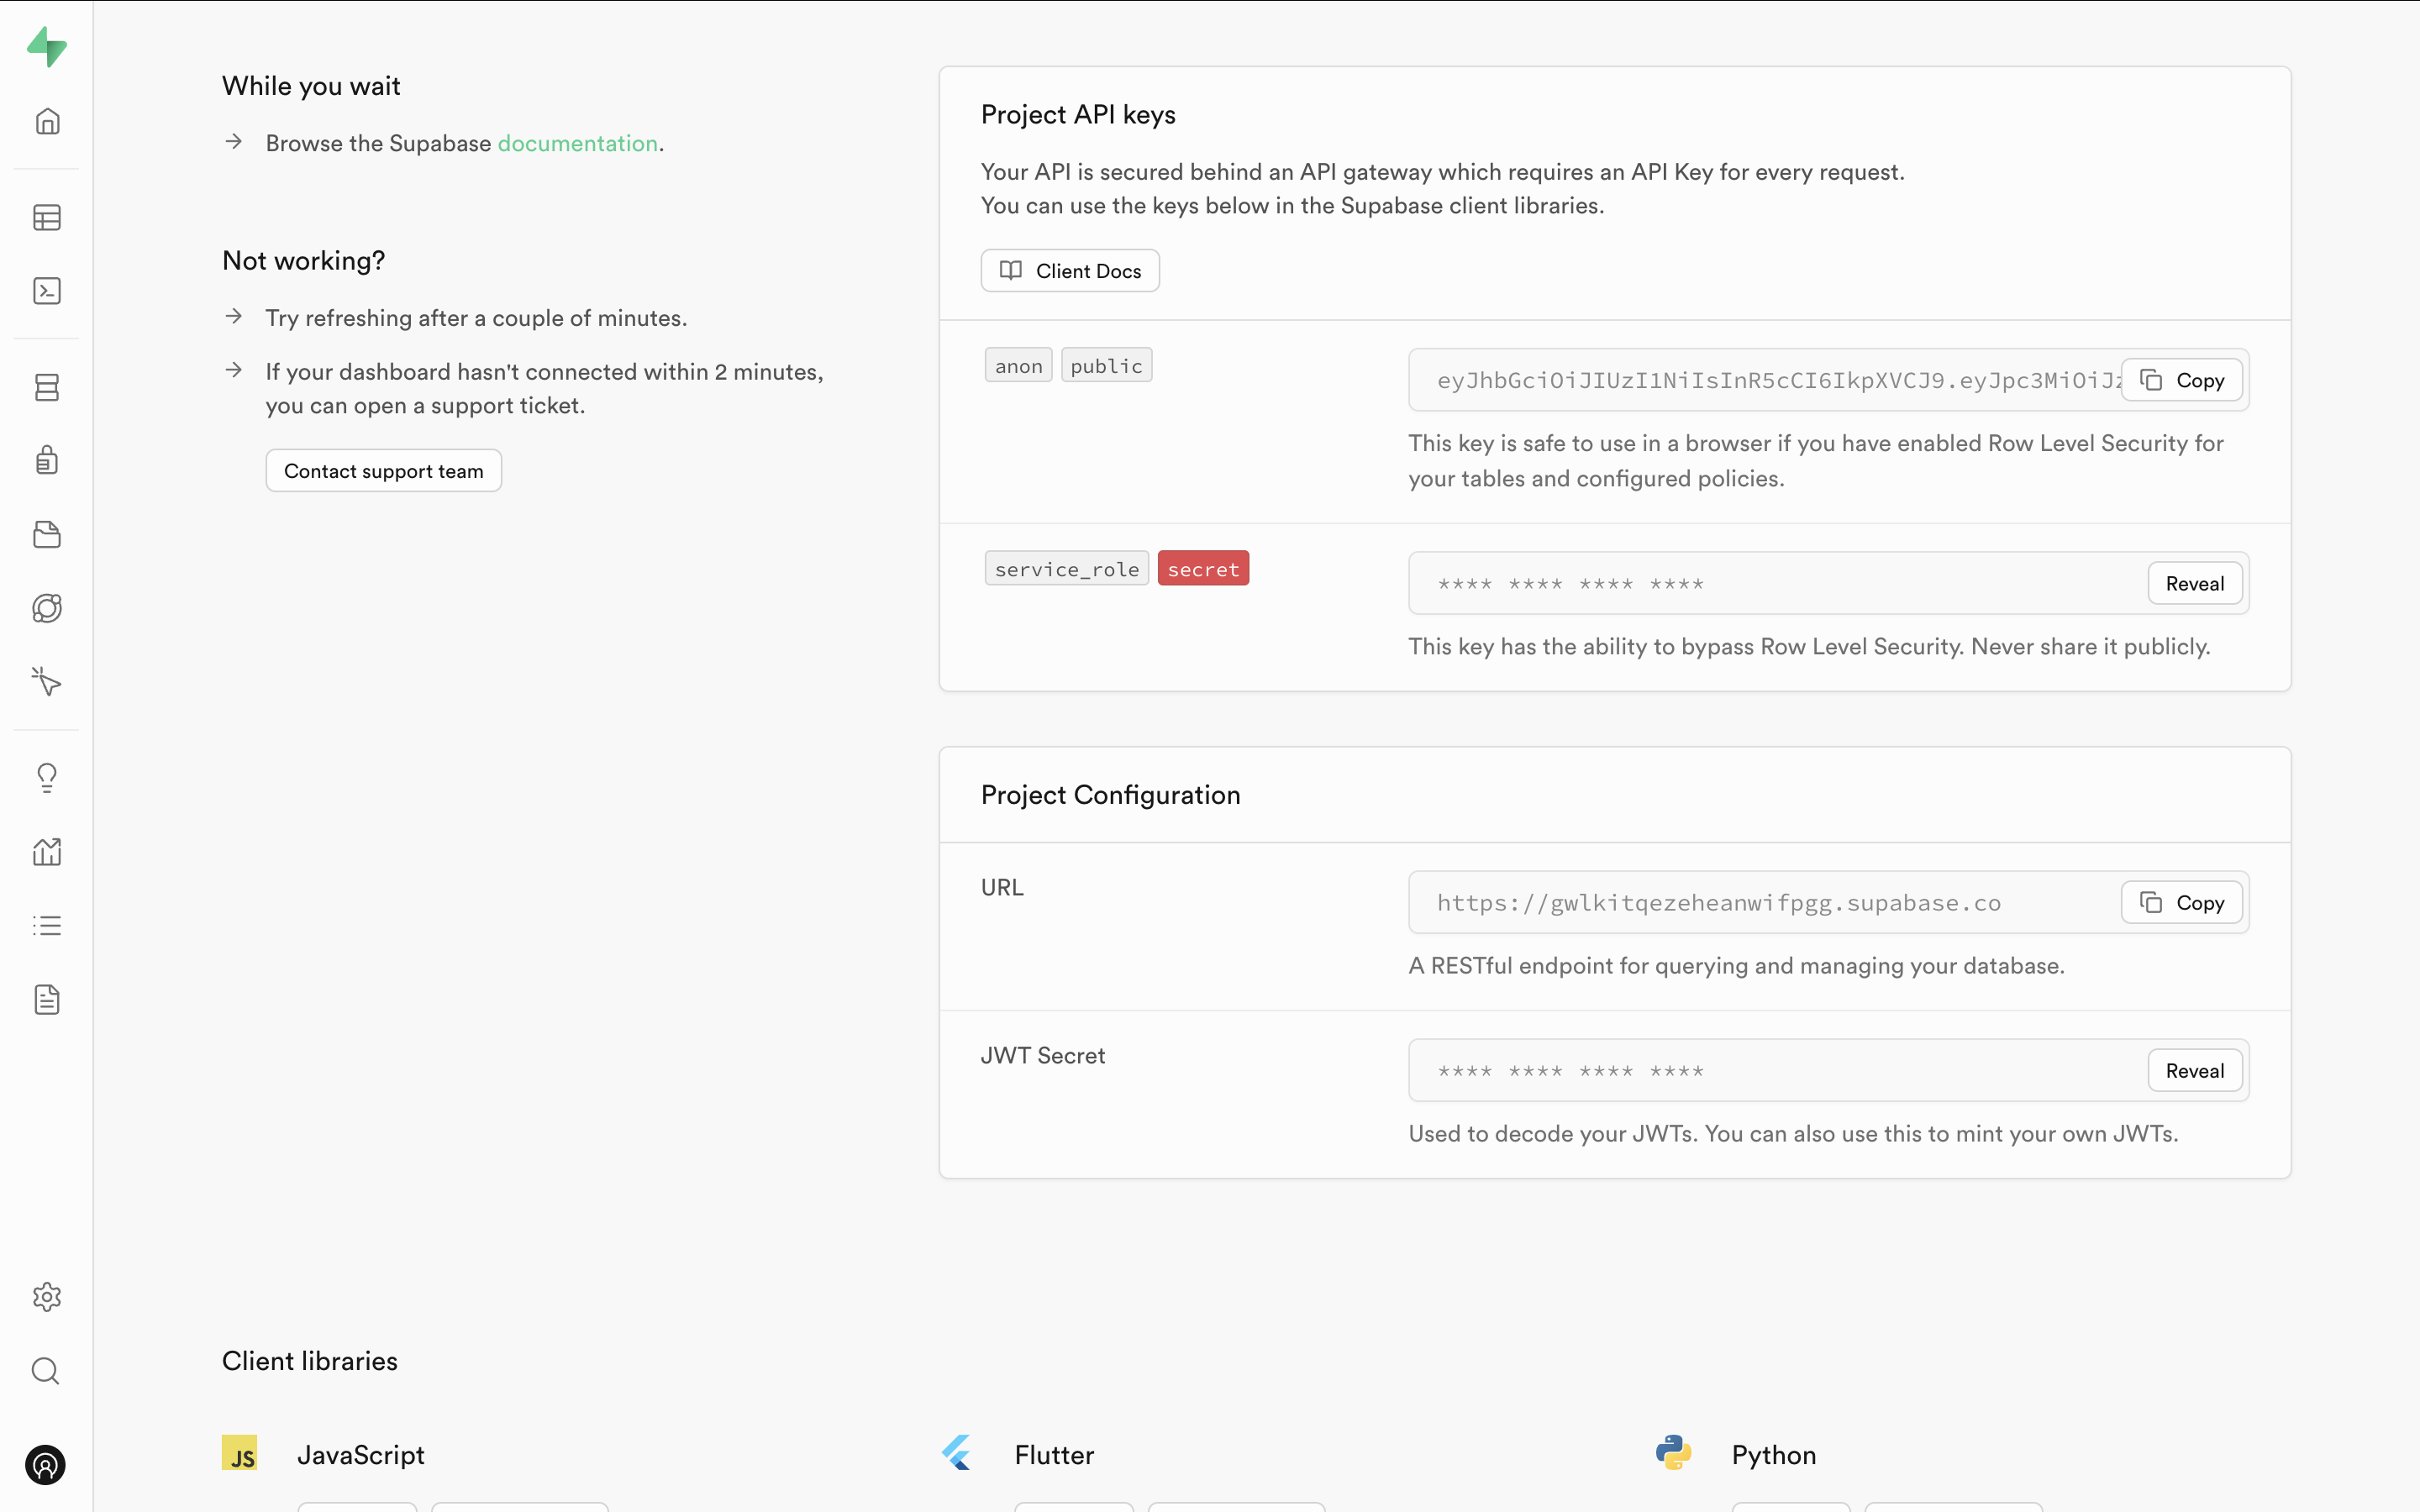
- The
-
Create the
generated_imagesTable
Head to the Tables section in the Supabase dashboard to create a new table. Name the tablegenerated_images. Add the necessary columns as shown below.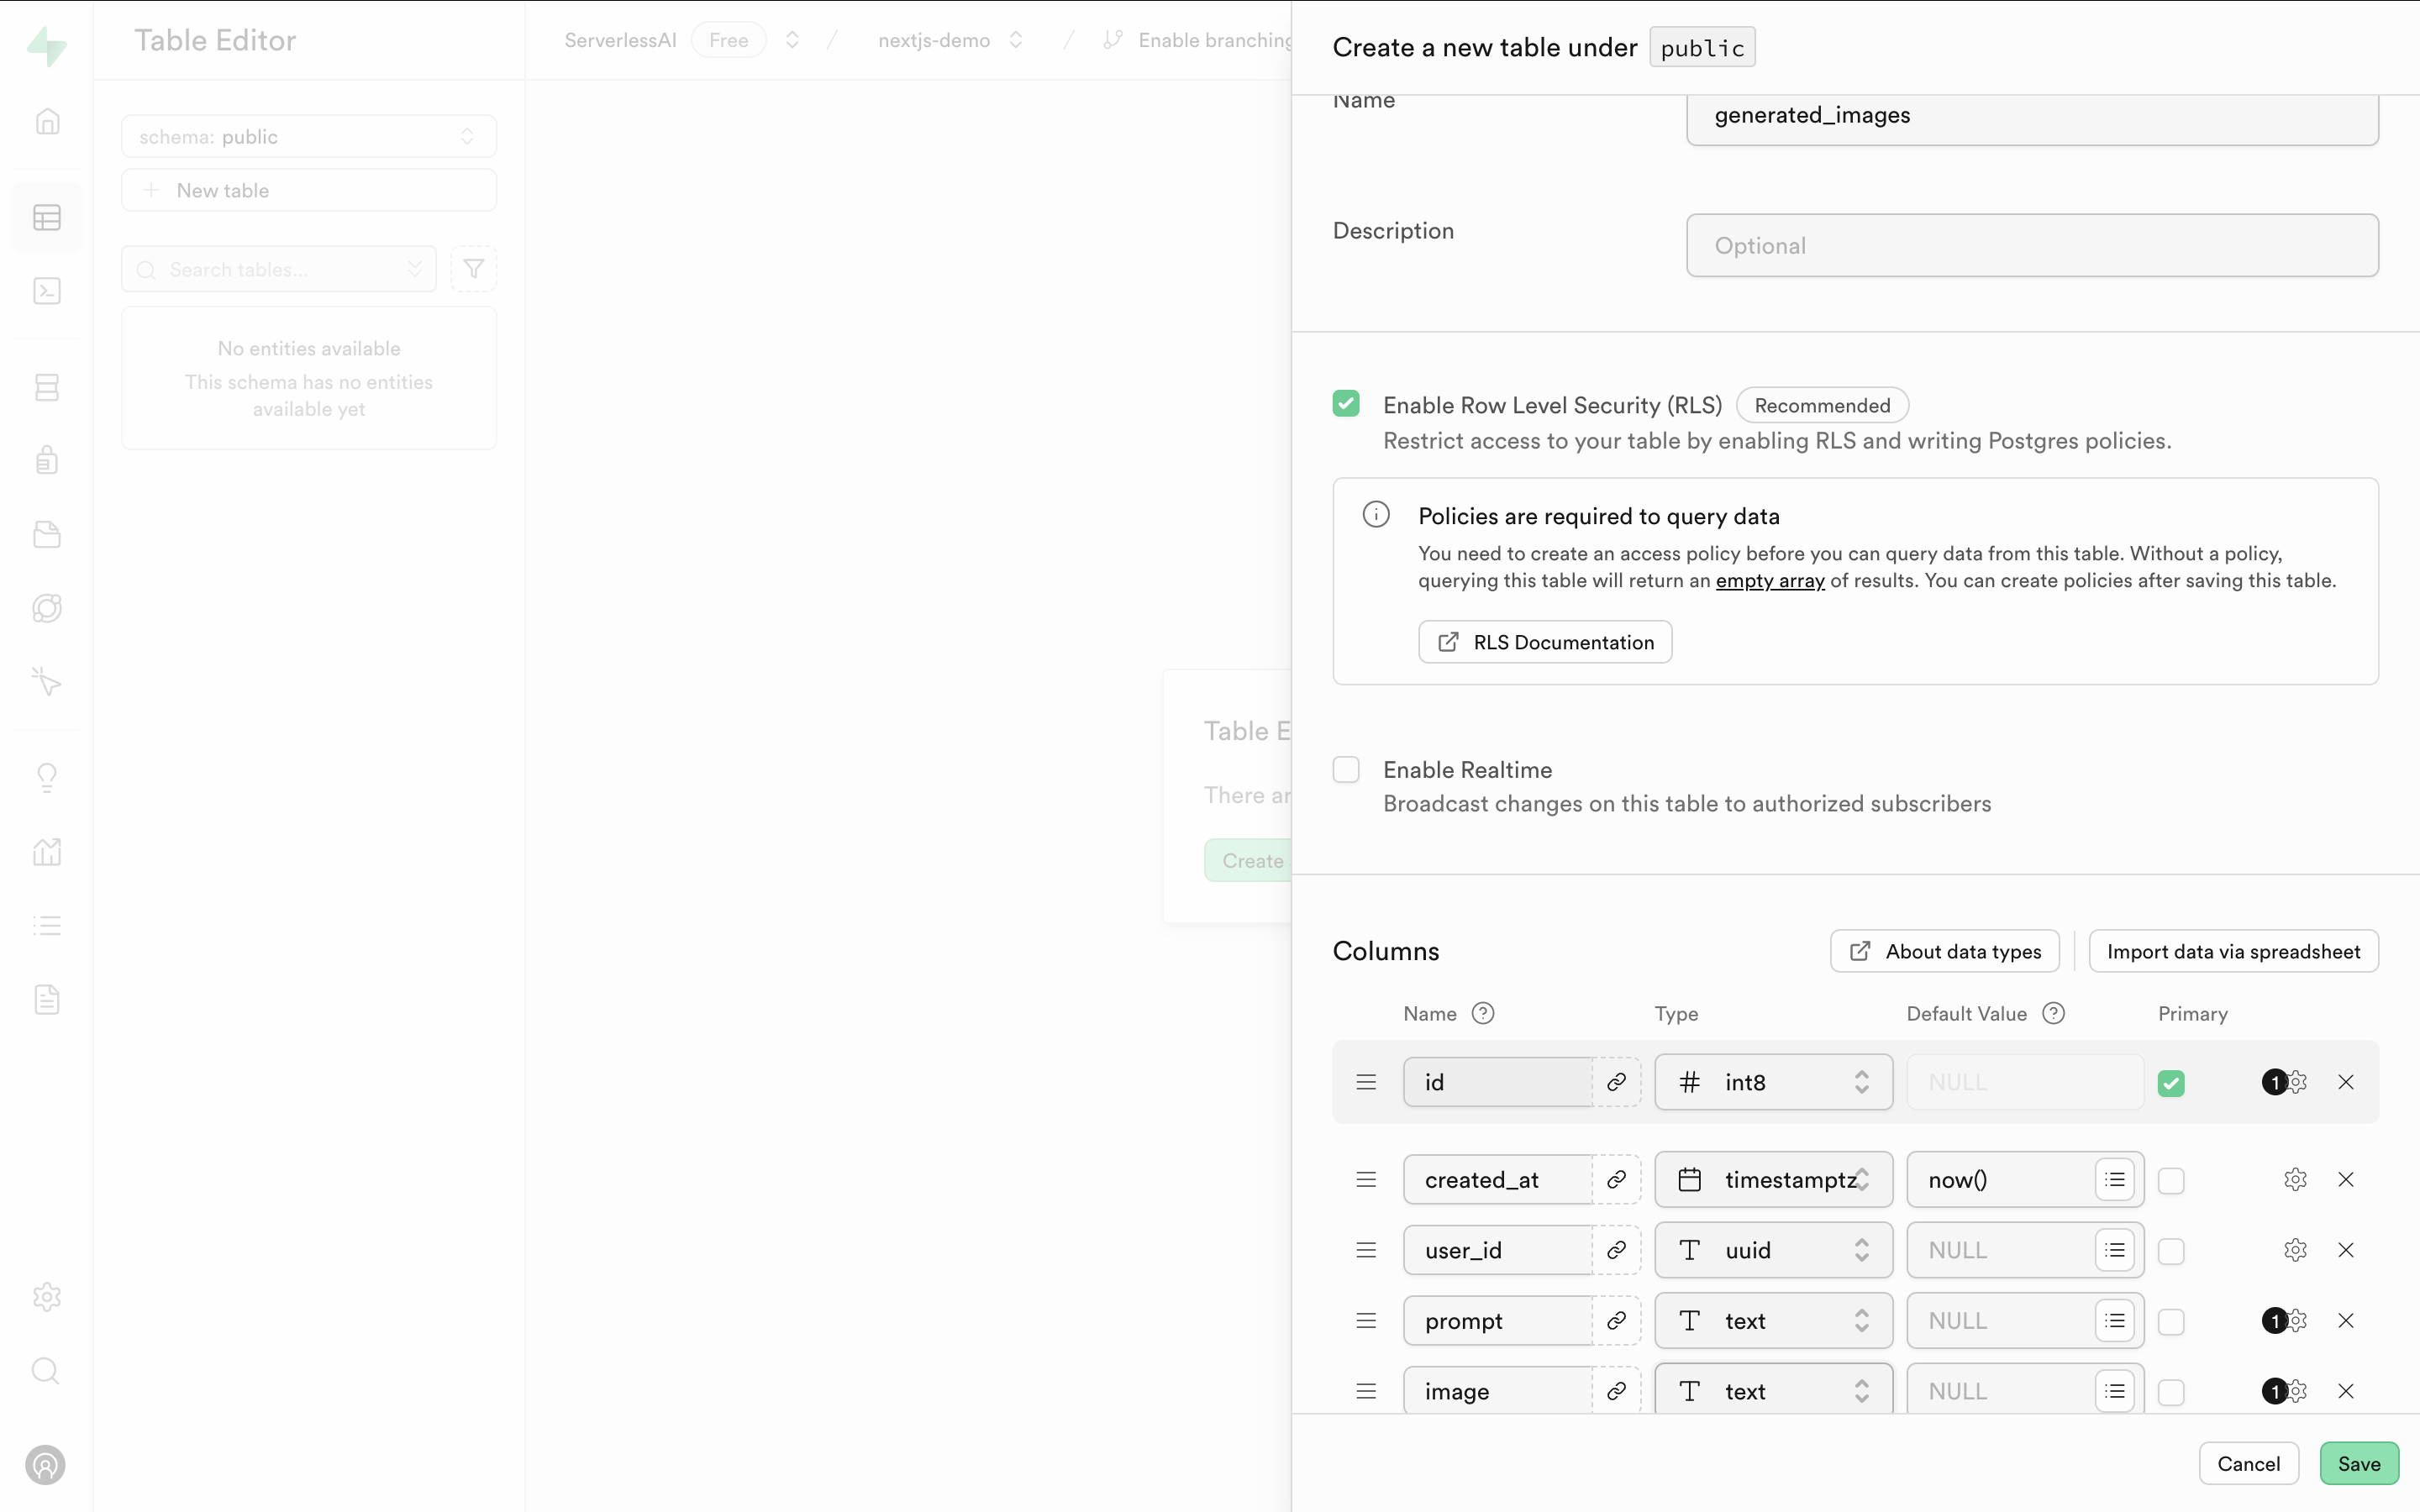
Ensure that Row Level Security (RLS) is enabled so that only authenticated users can access their own data.
-
Add Row Level Security (RLS) Policies
Next, navigate to the Authentication -> Policy page in the Supabase dashboard. Here, you will set up RLS policies for thegenerated_imagestable.First, create a
SELECTpolicy using the provided template to ensure users can only view their own data.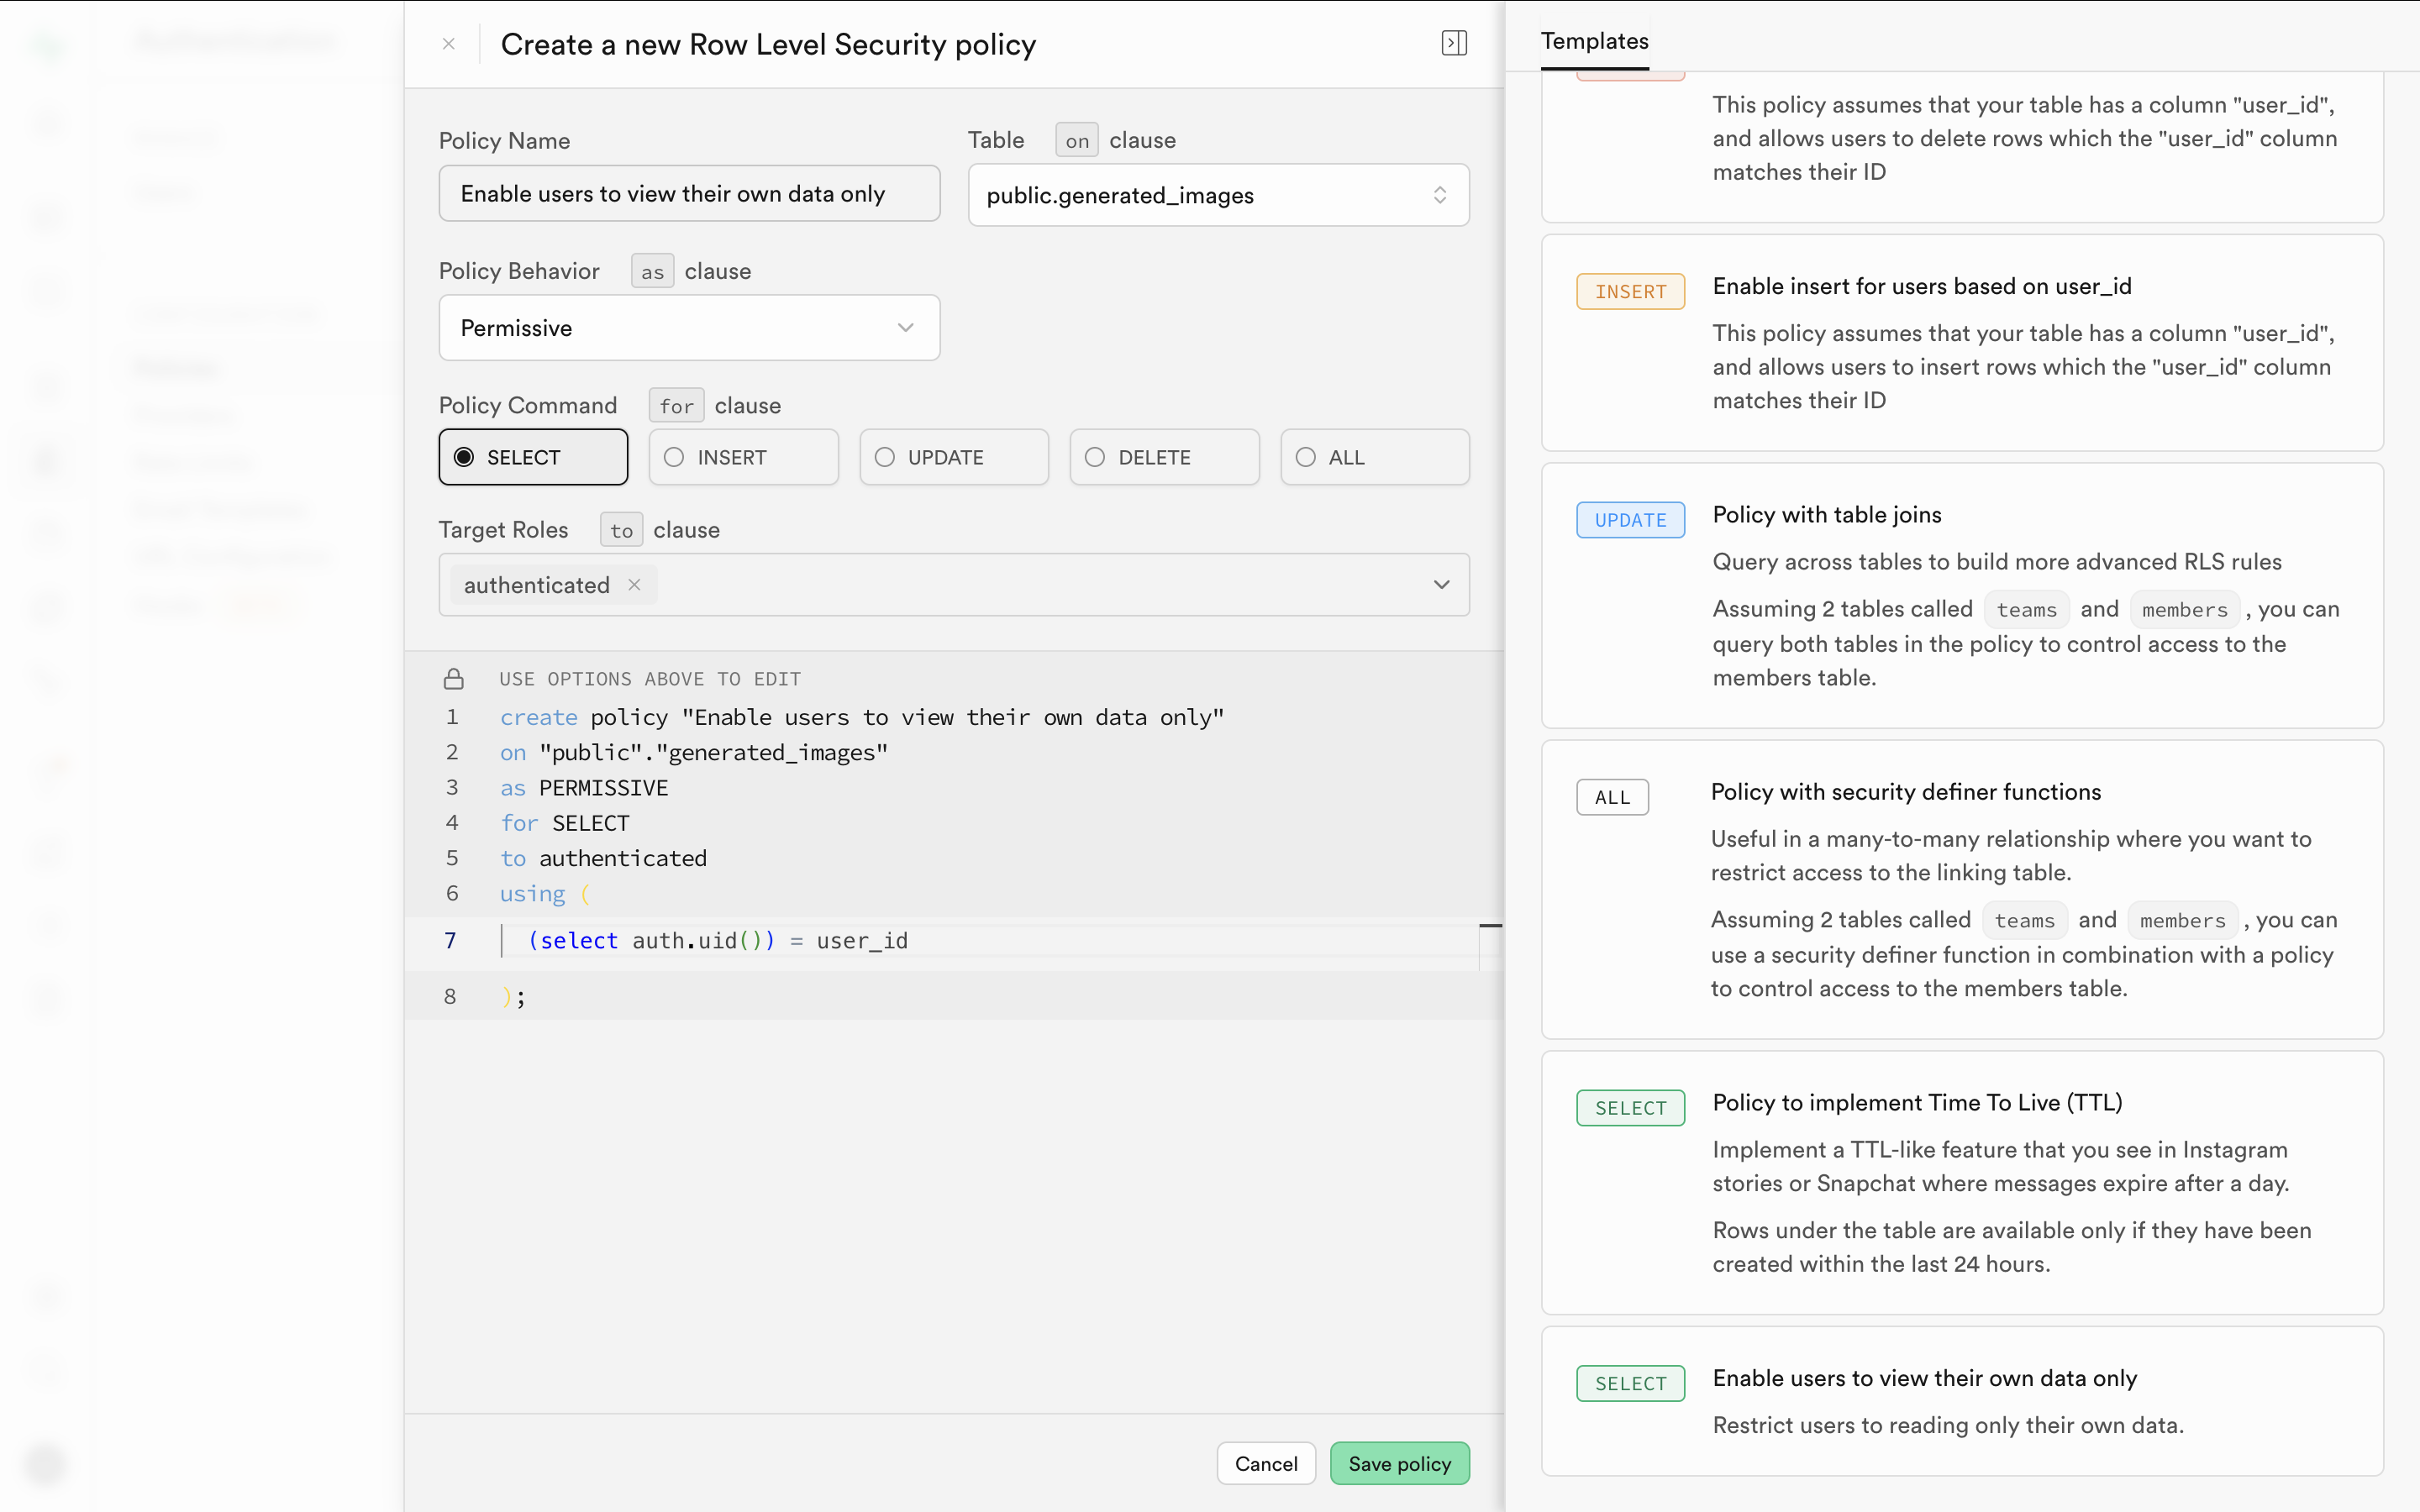
Similarly, create an
INSERTpolicy using the template to allow users to insert new data.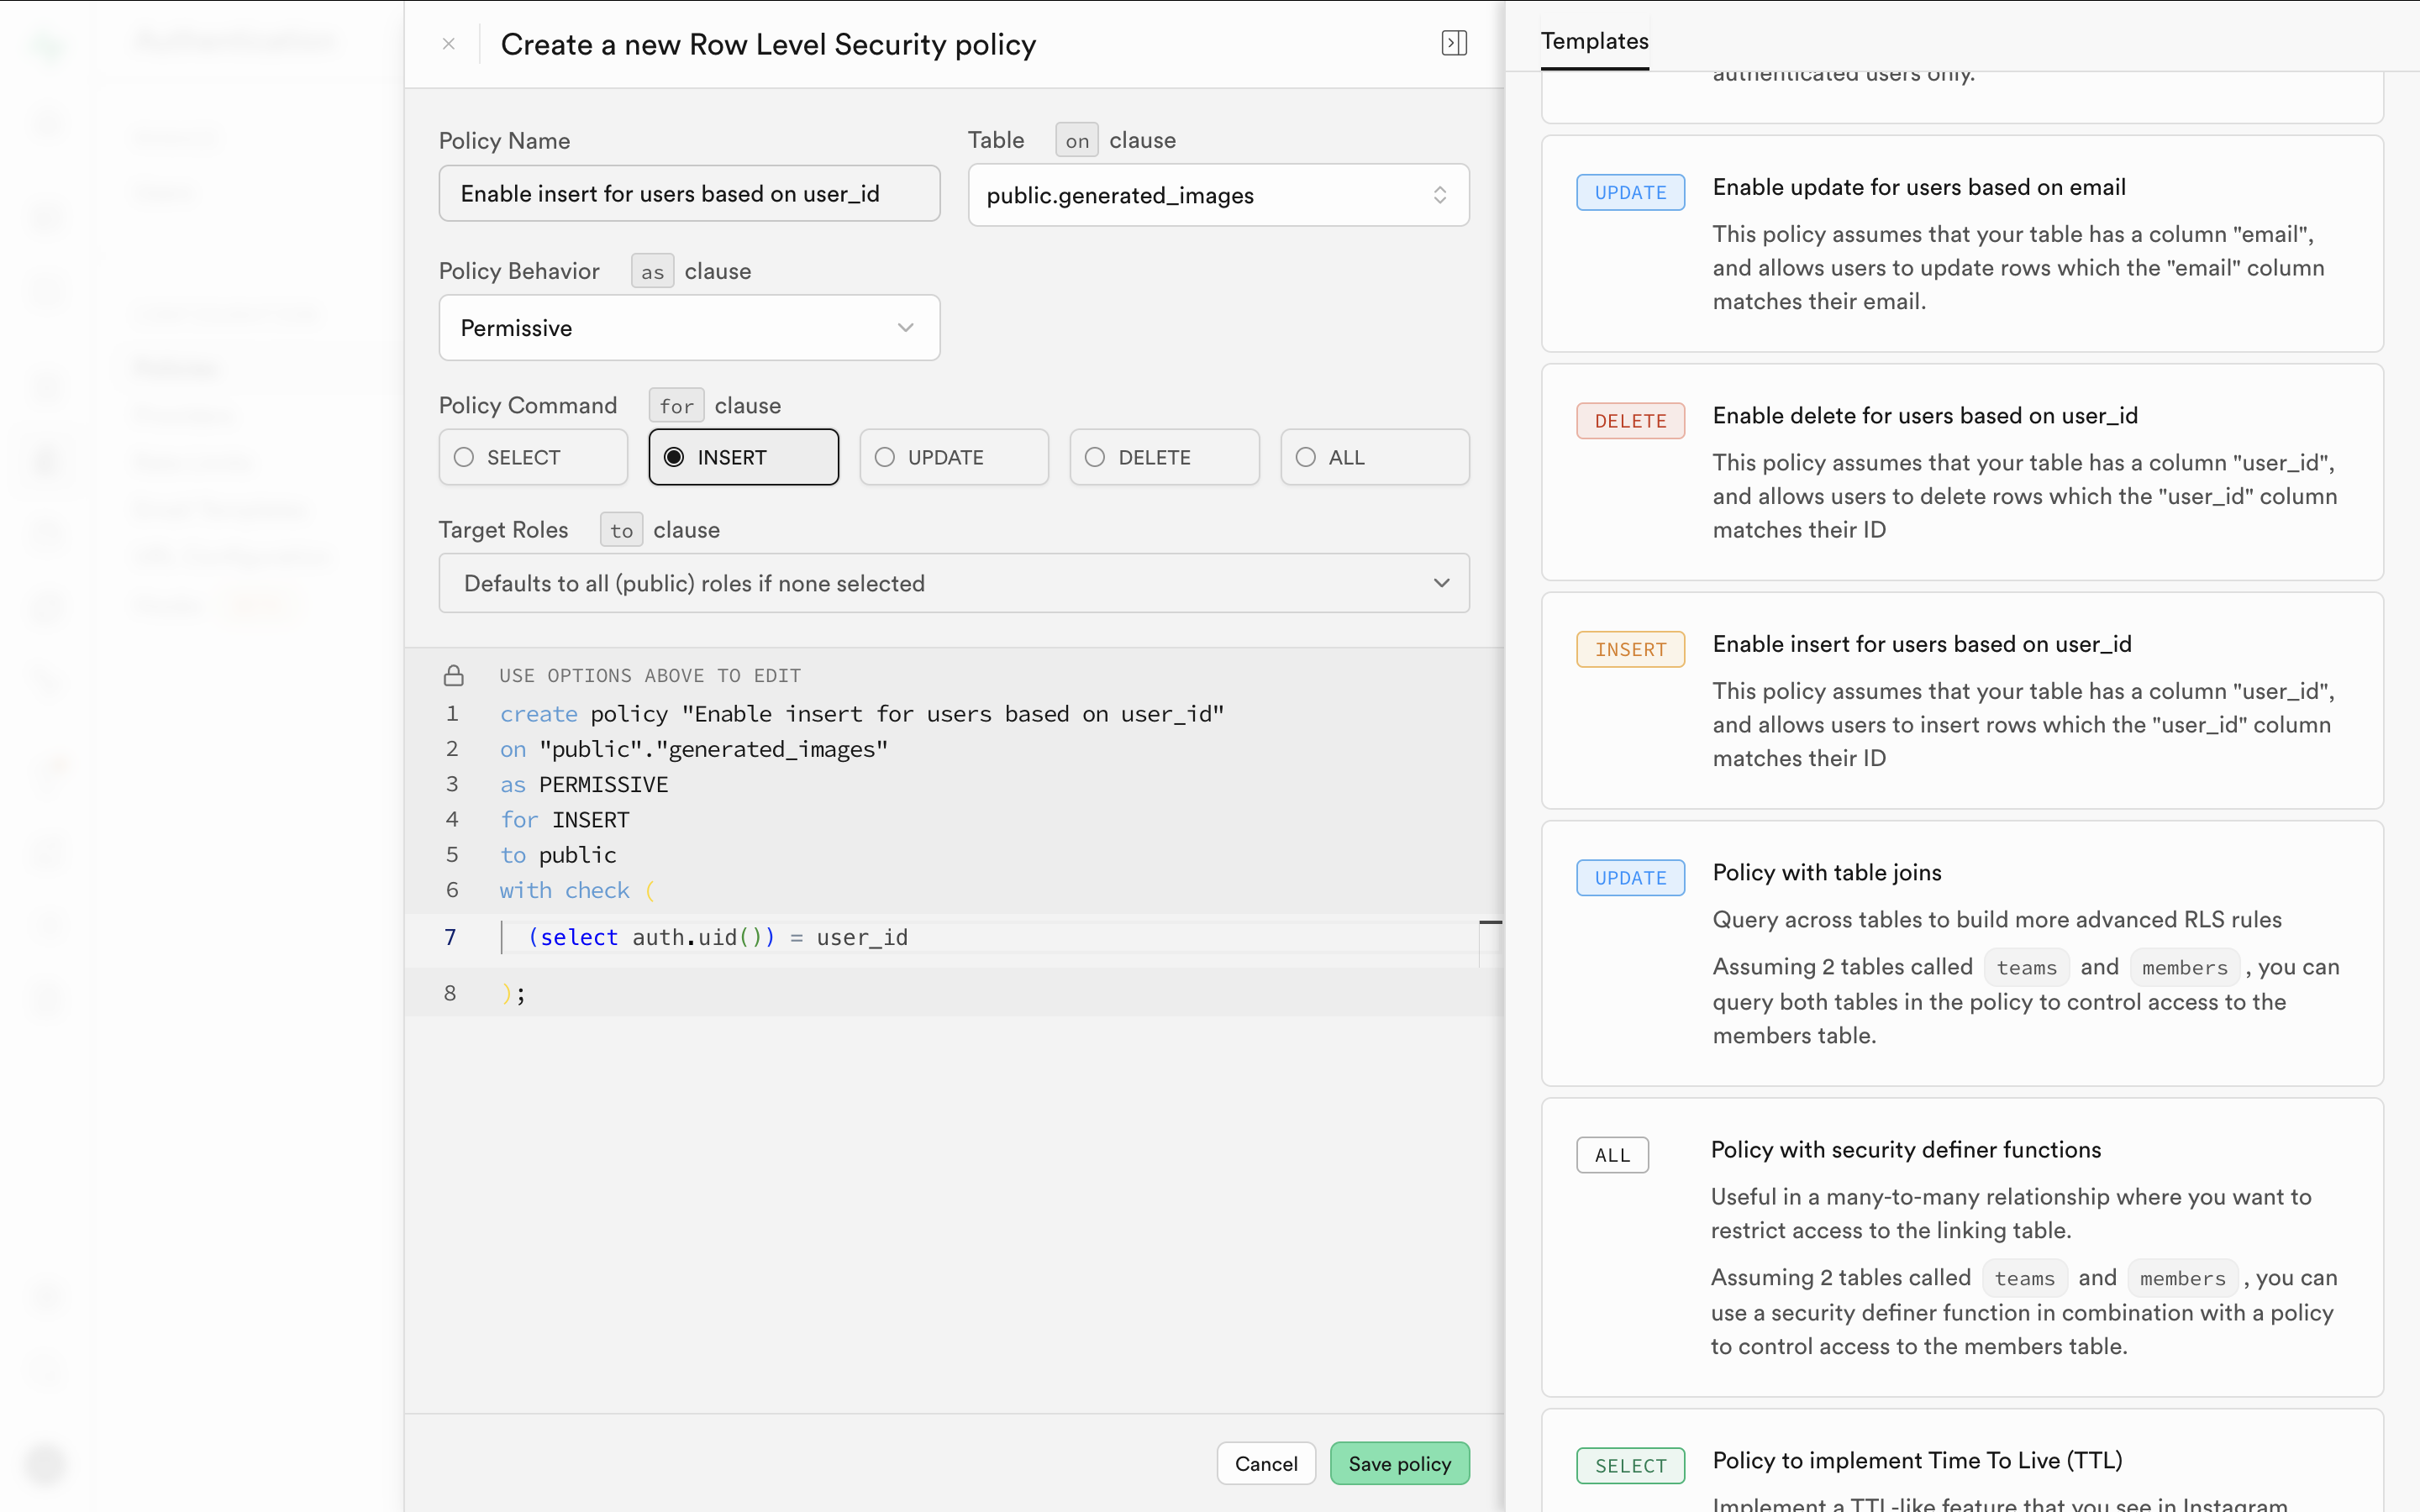
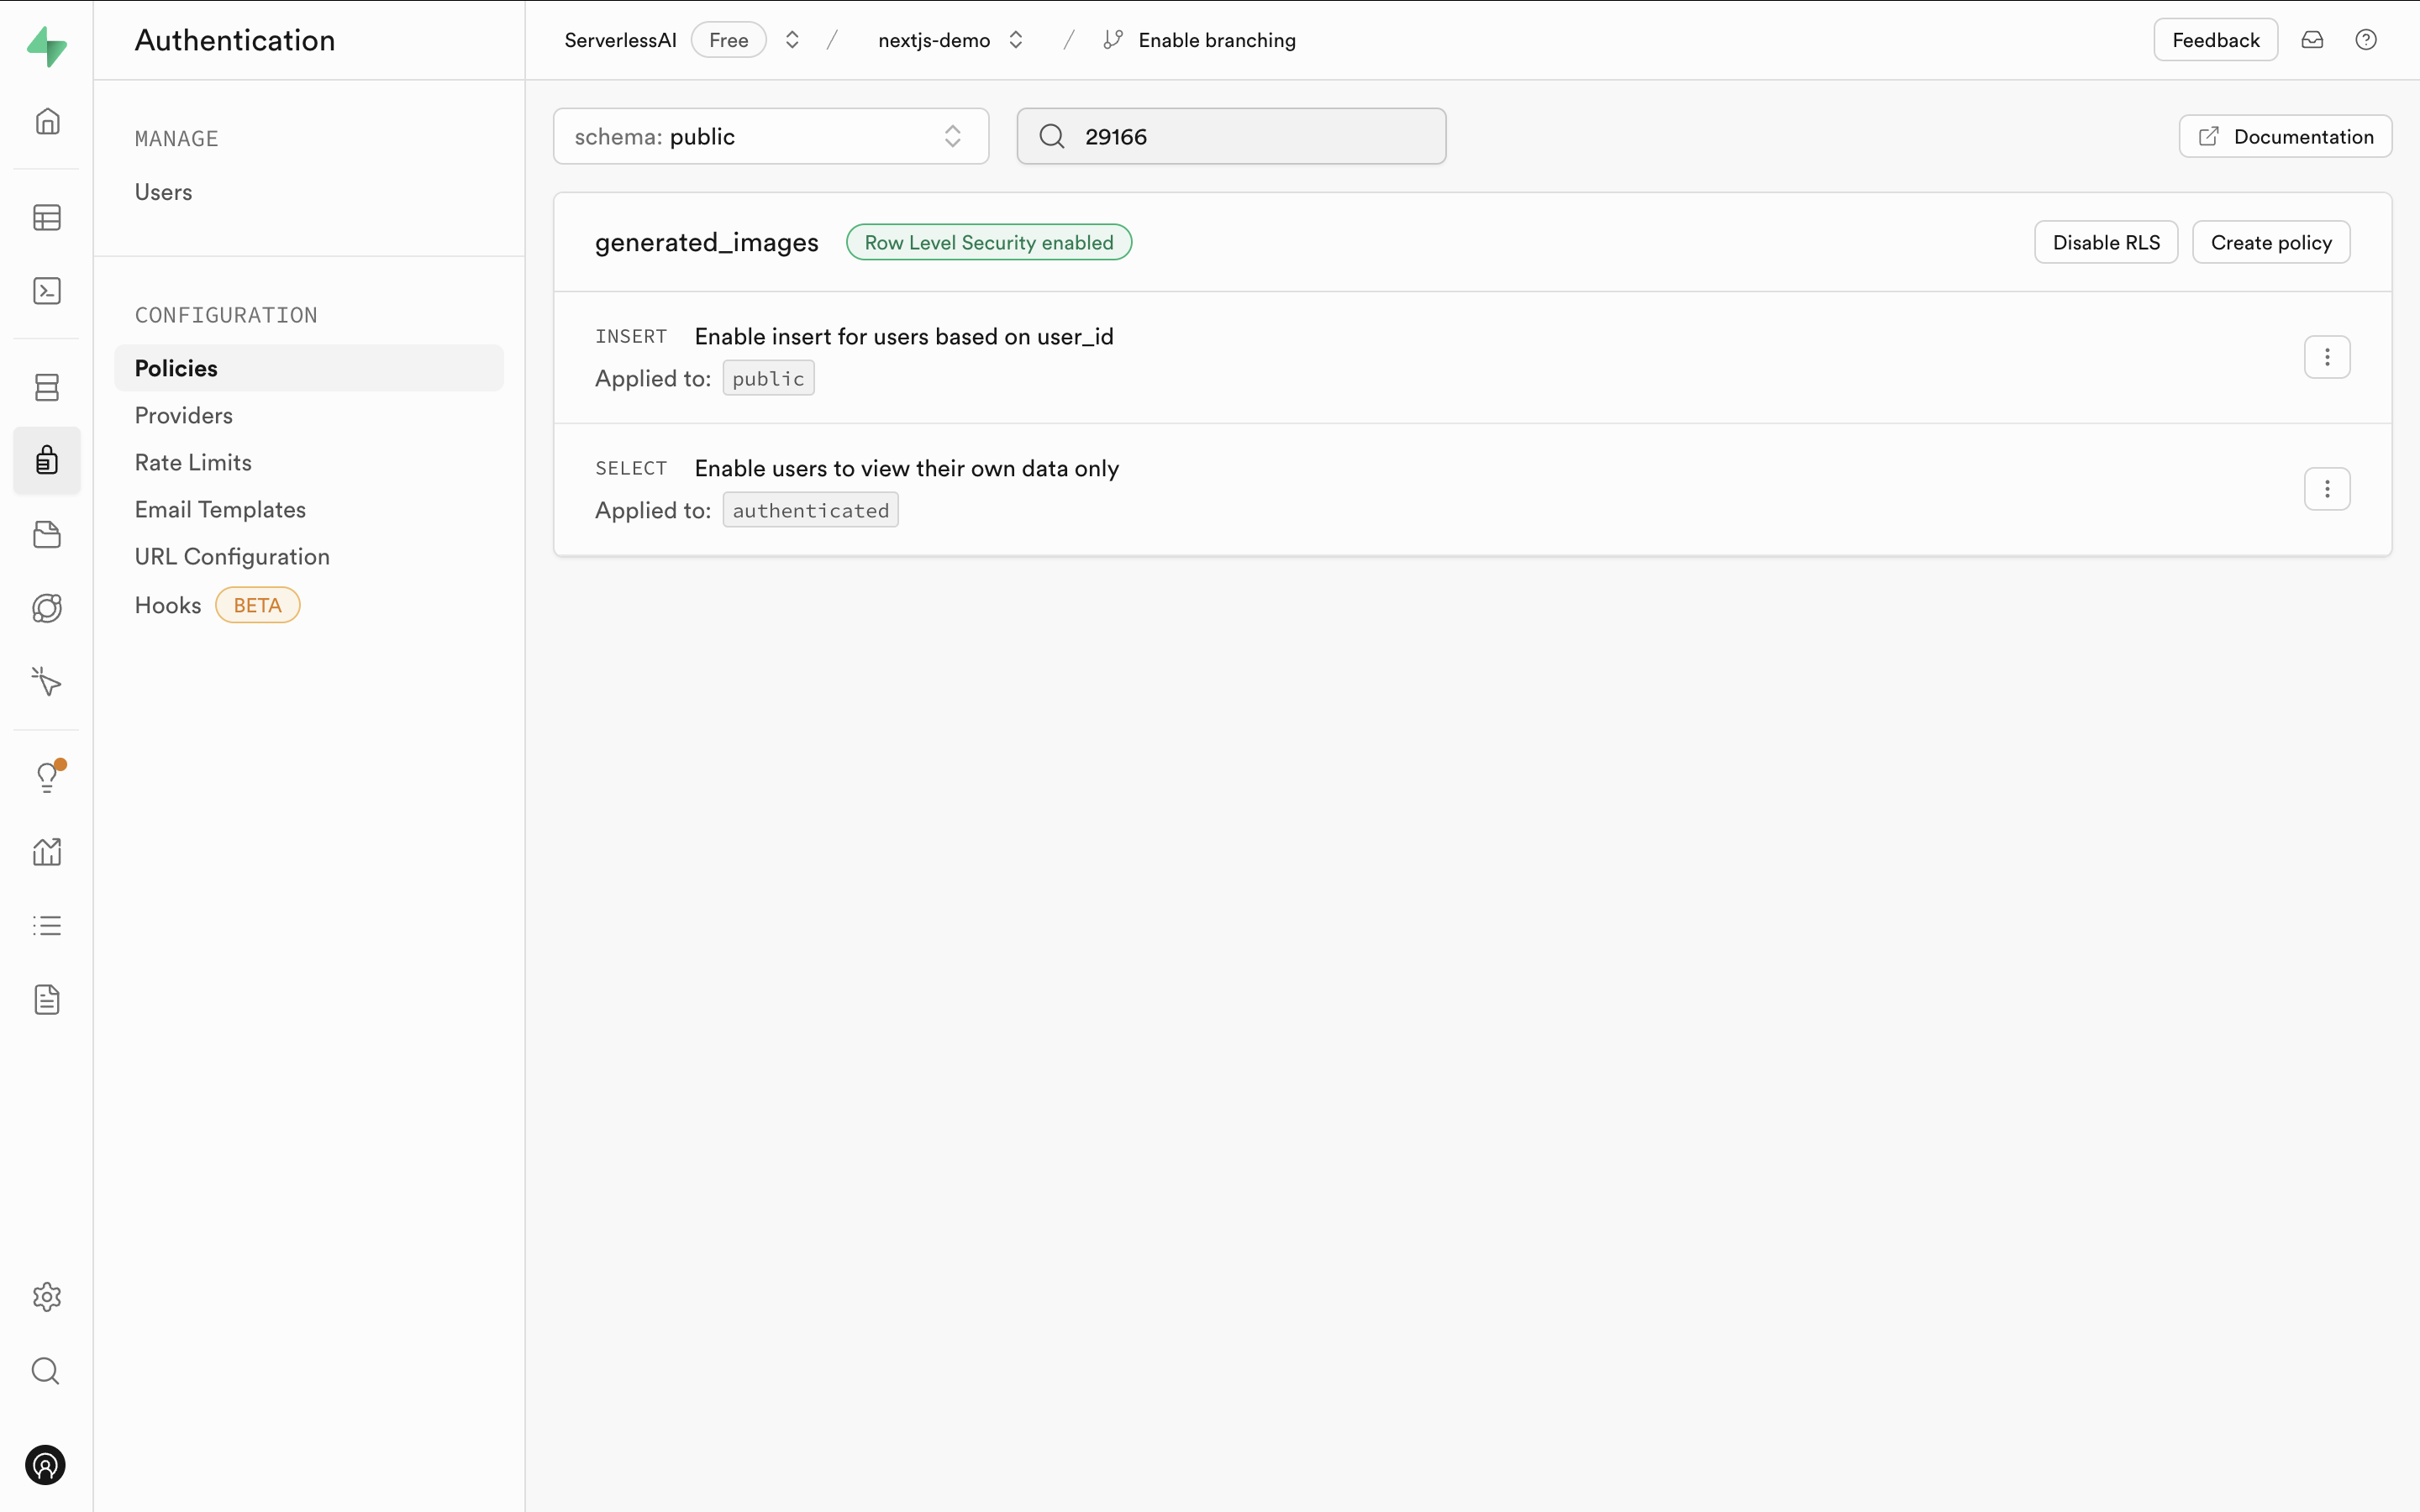
After completing both policies, you should see them listed on the RLS page.
With these steps completed, your Supabase project is now set up and ready to store the generated images and manage user data securely.
Setting Up Your ServerlessAI Project
If you do not have a ServerlessAI account, or want to create a new project
-
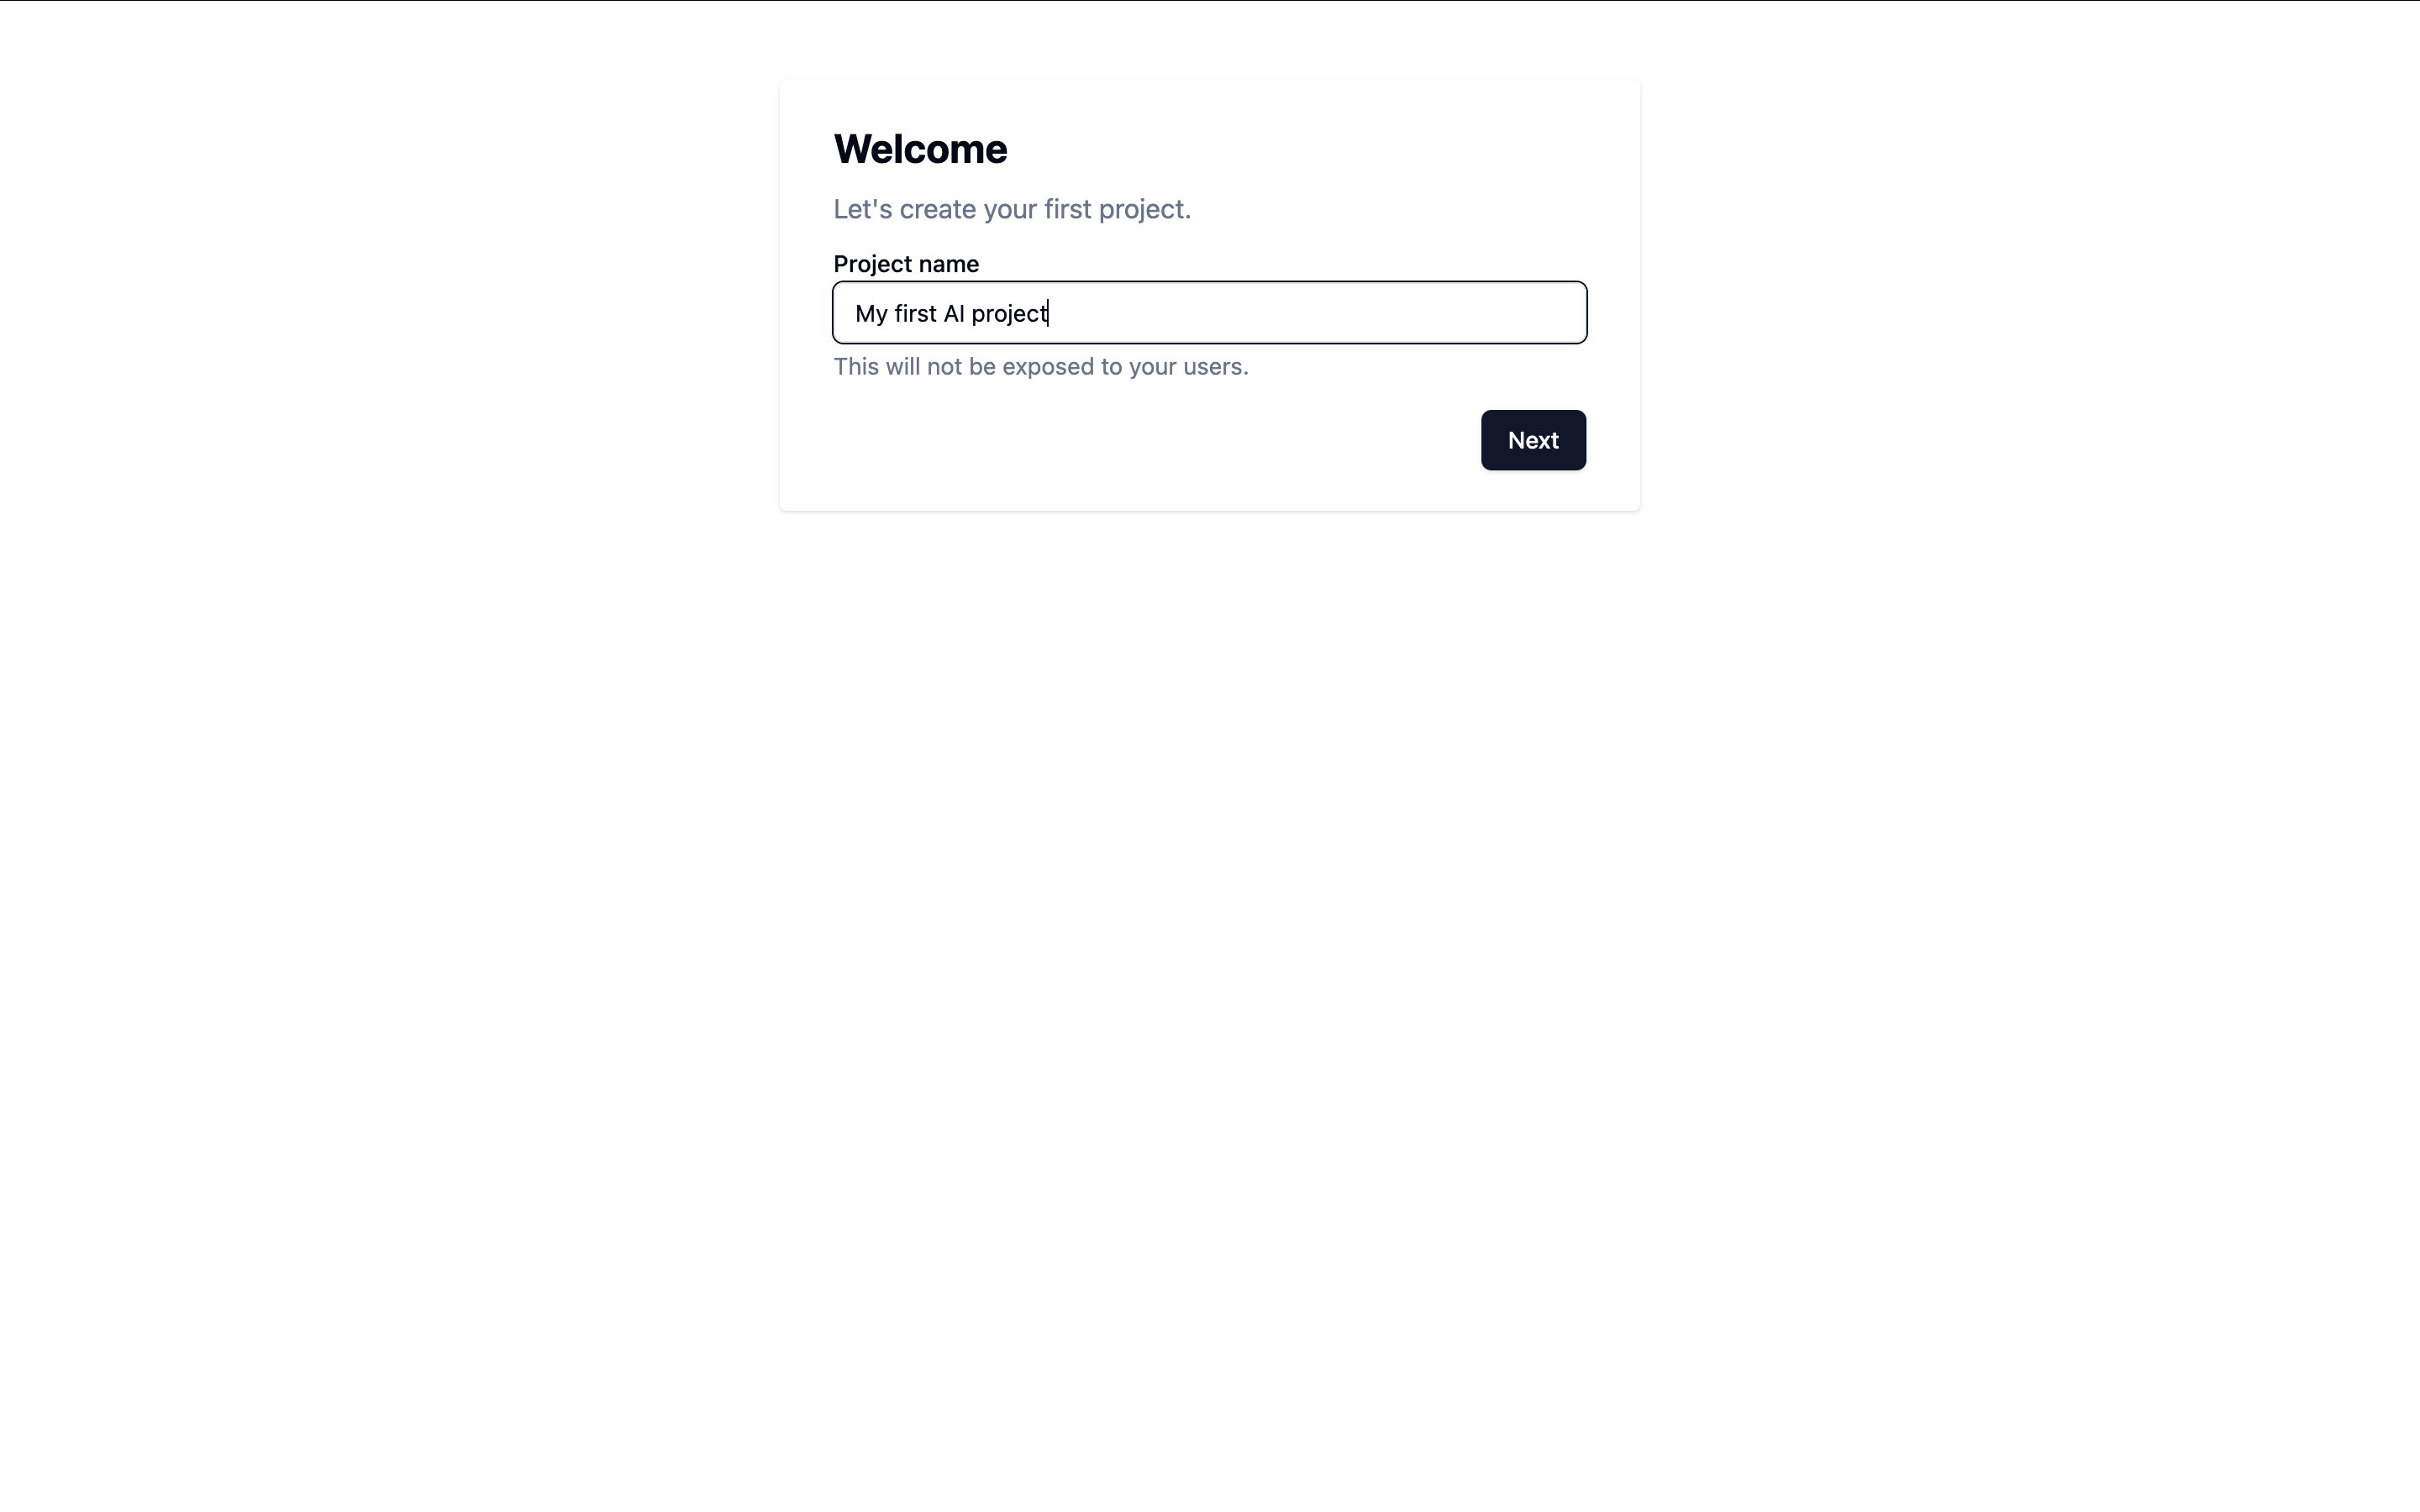
Register for ServerlessAI
Head to ServerlessAI and sign up. Once registered, follow the wizard to create a new project.If you have already created an account and want to create a new project, Click "Create project" in the project selector dropdown on upper left corner.
-
Add the OpenAI Provider
Add OpenAI as a provider by entering your OpenAI API key.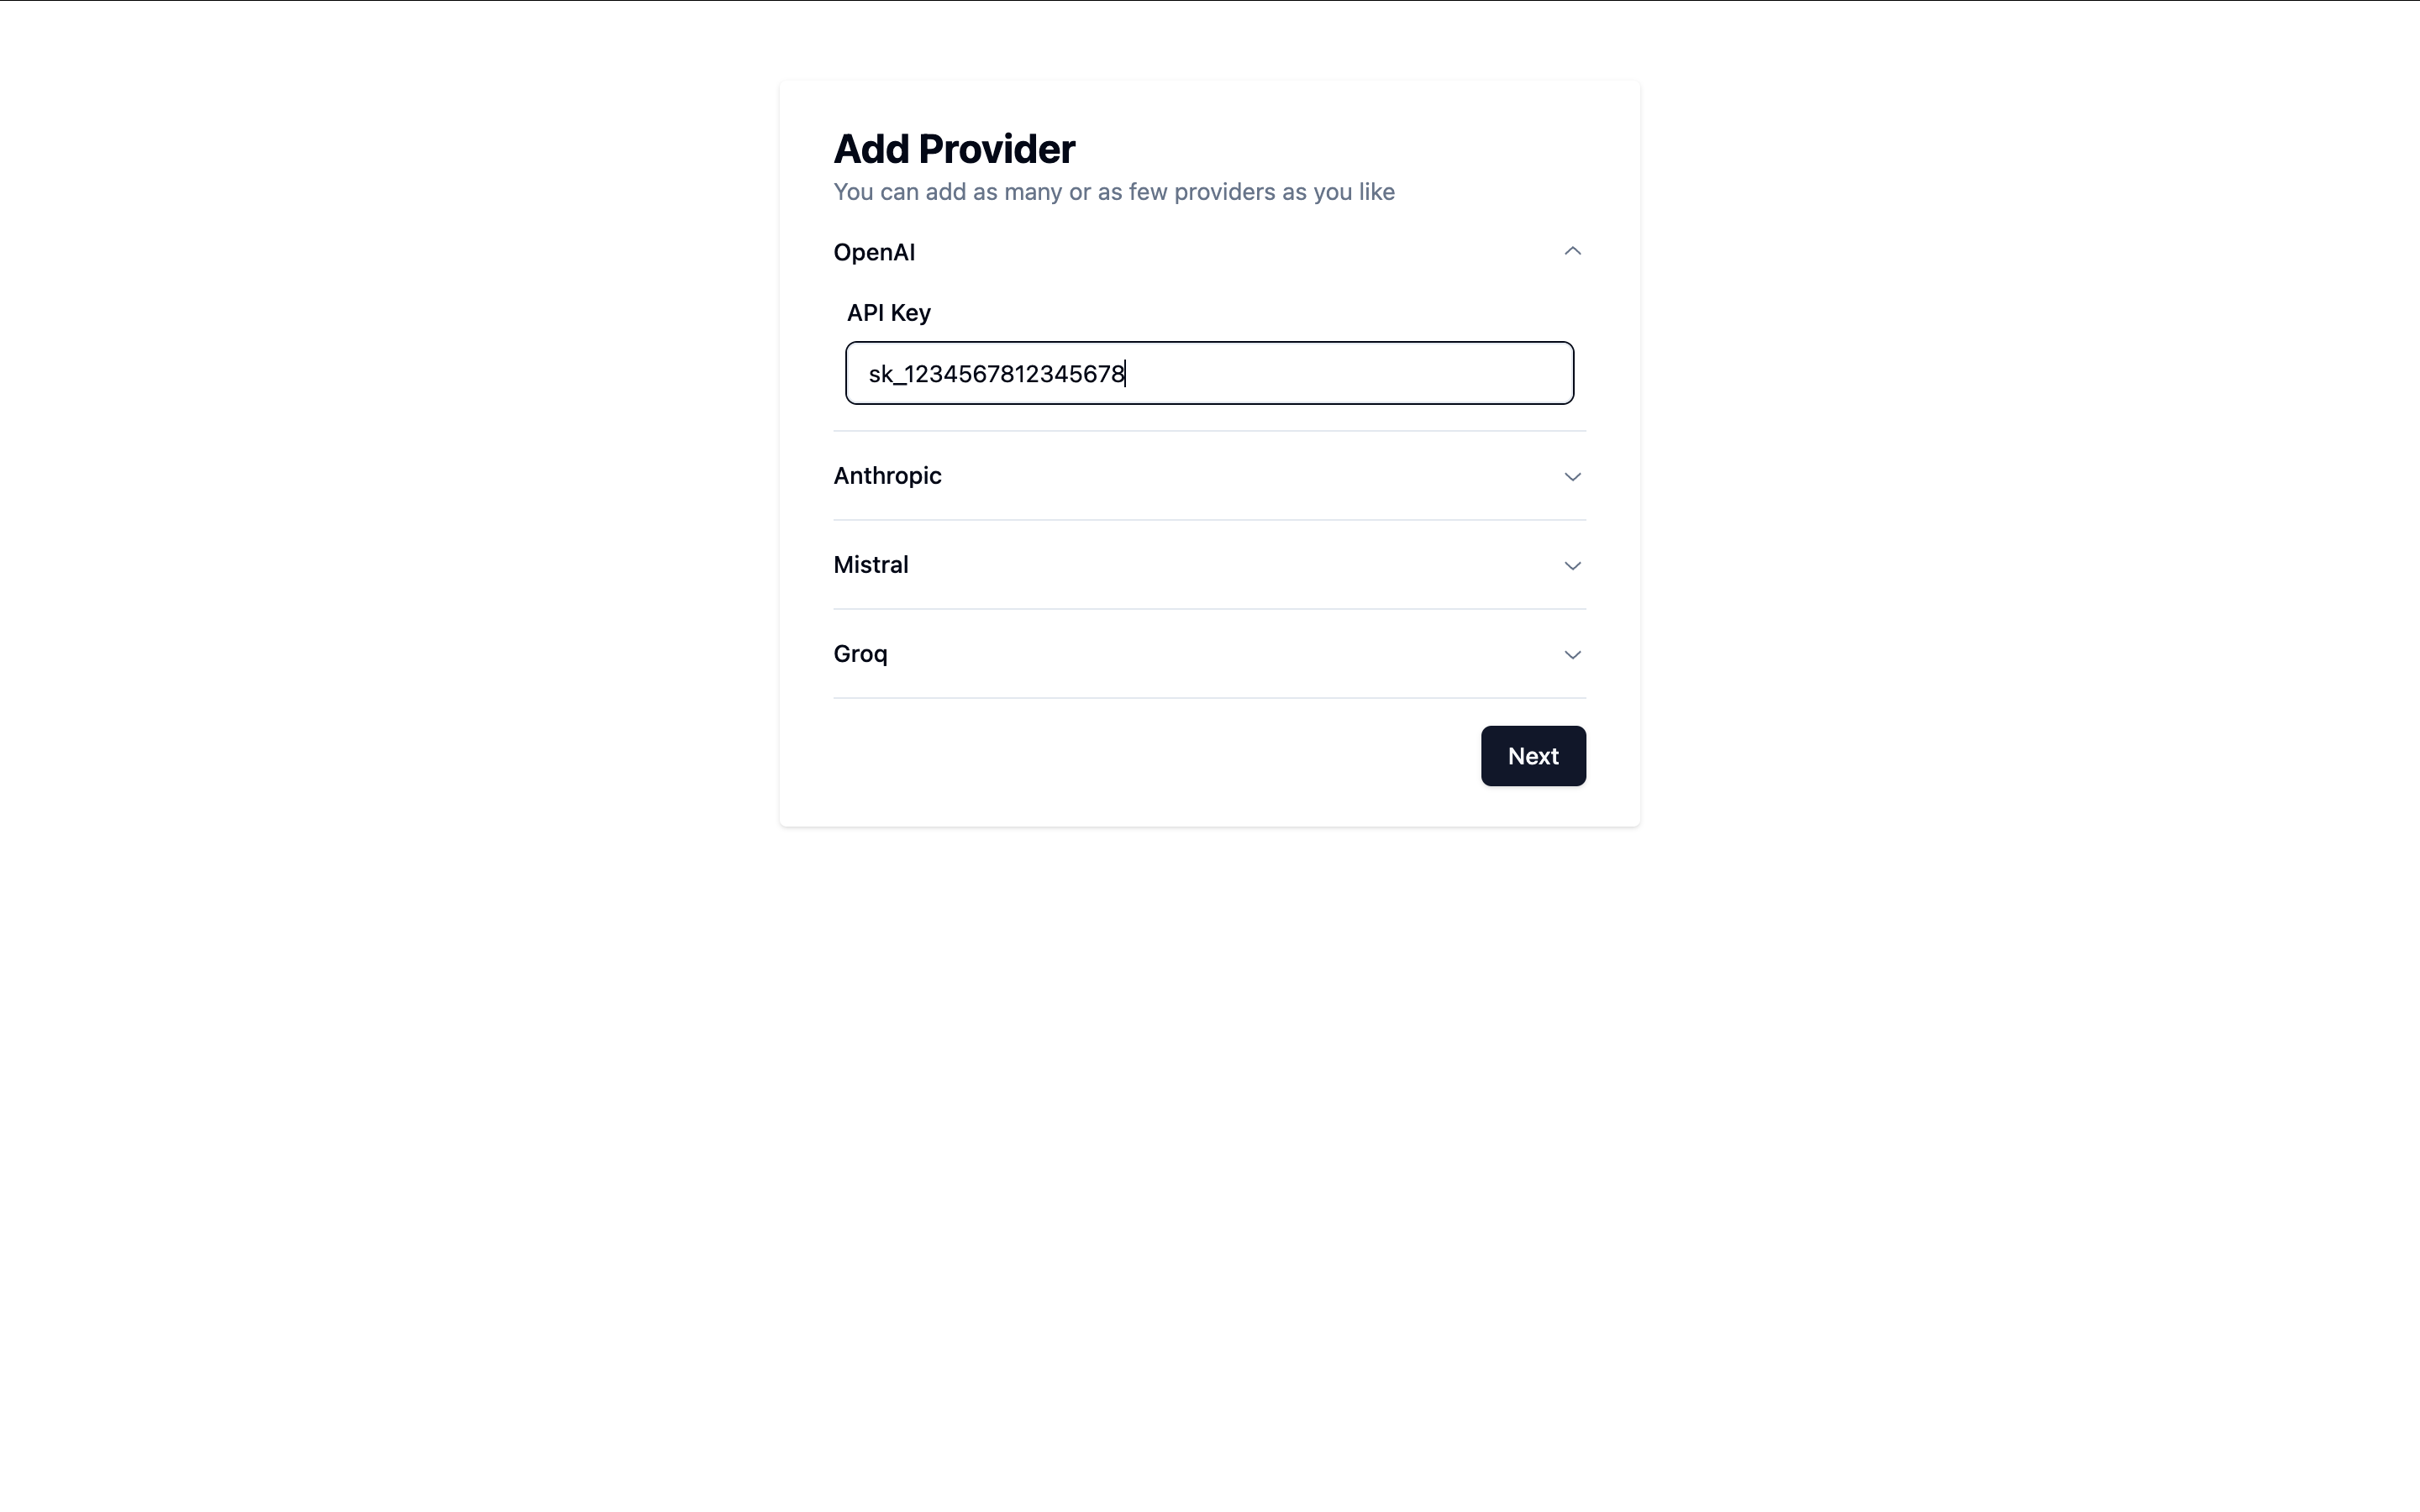
-
Enable Text-to-Image Capability
Enable the text-to-image capability, which will be used to generate pop art images.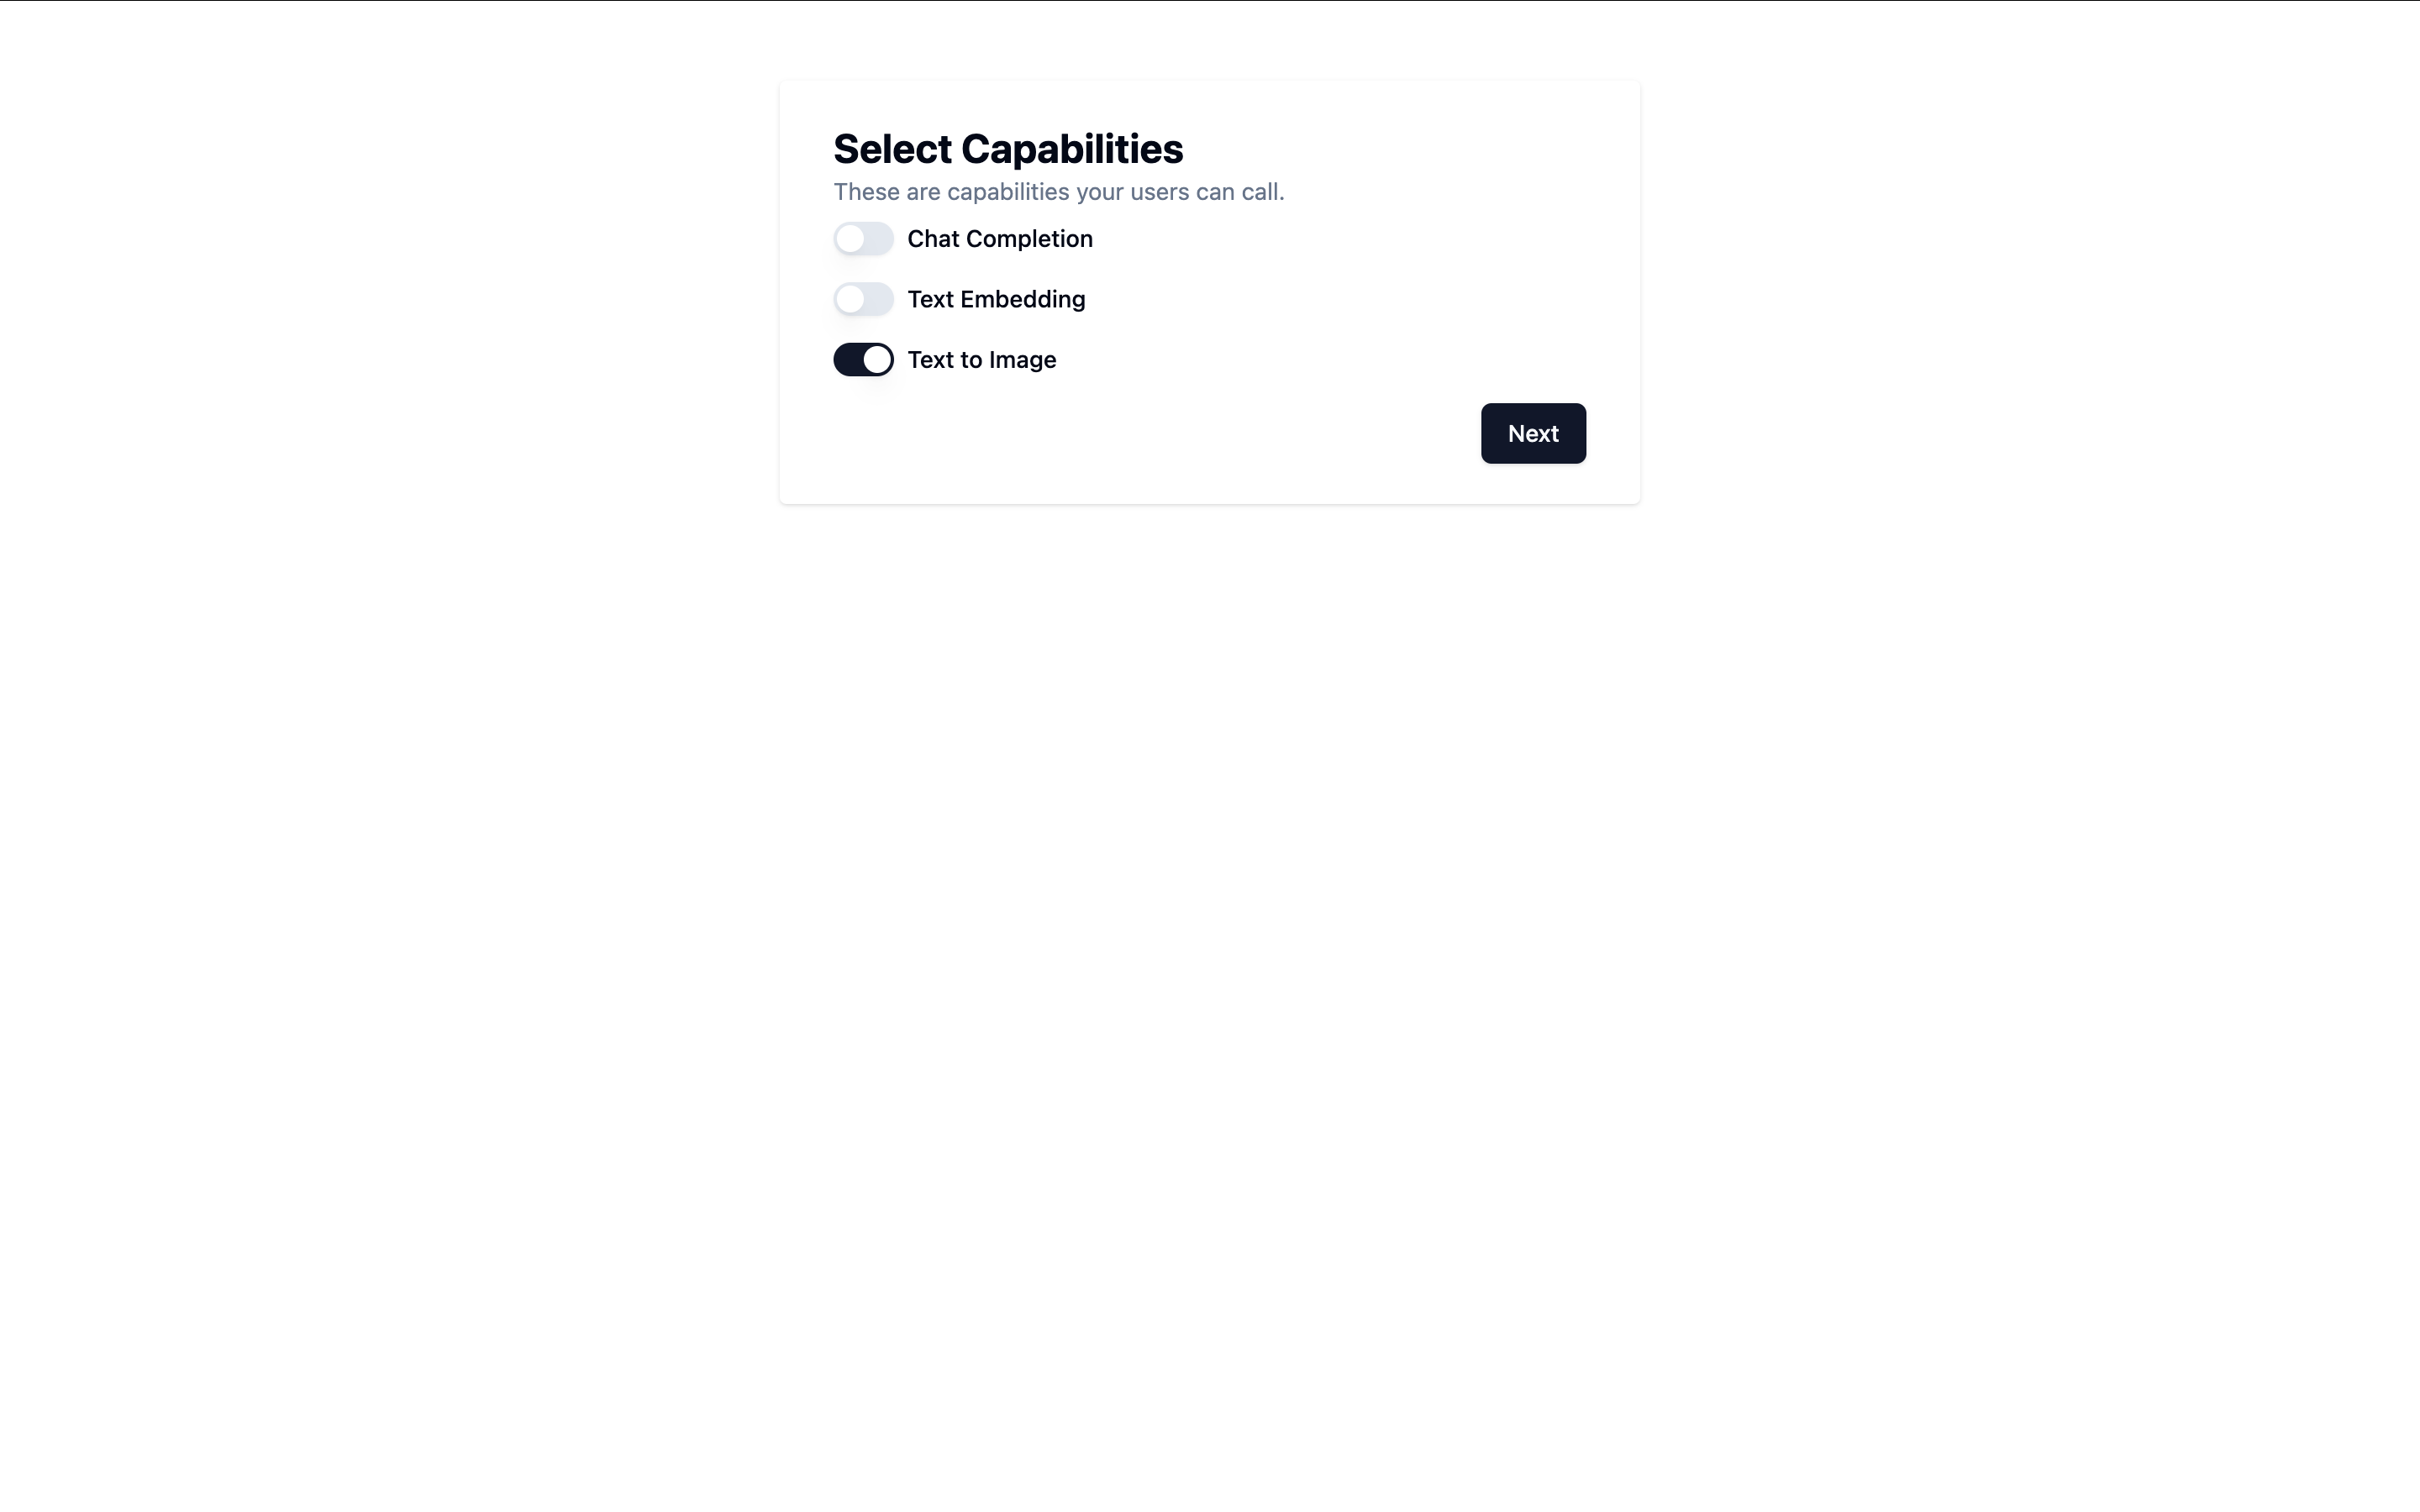
-
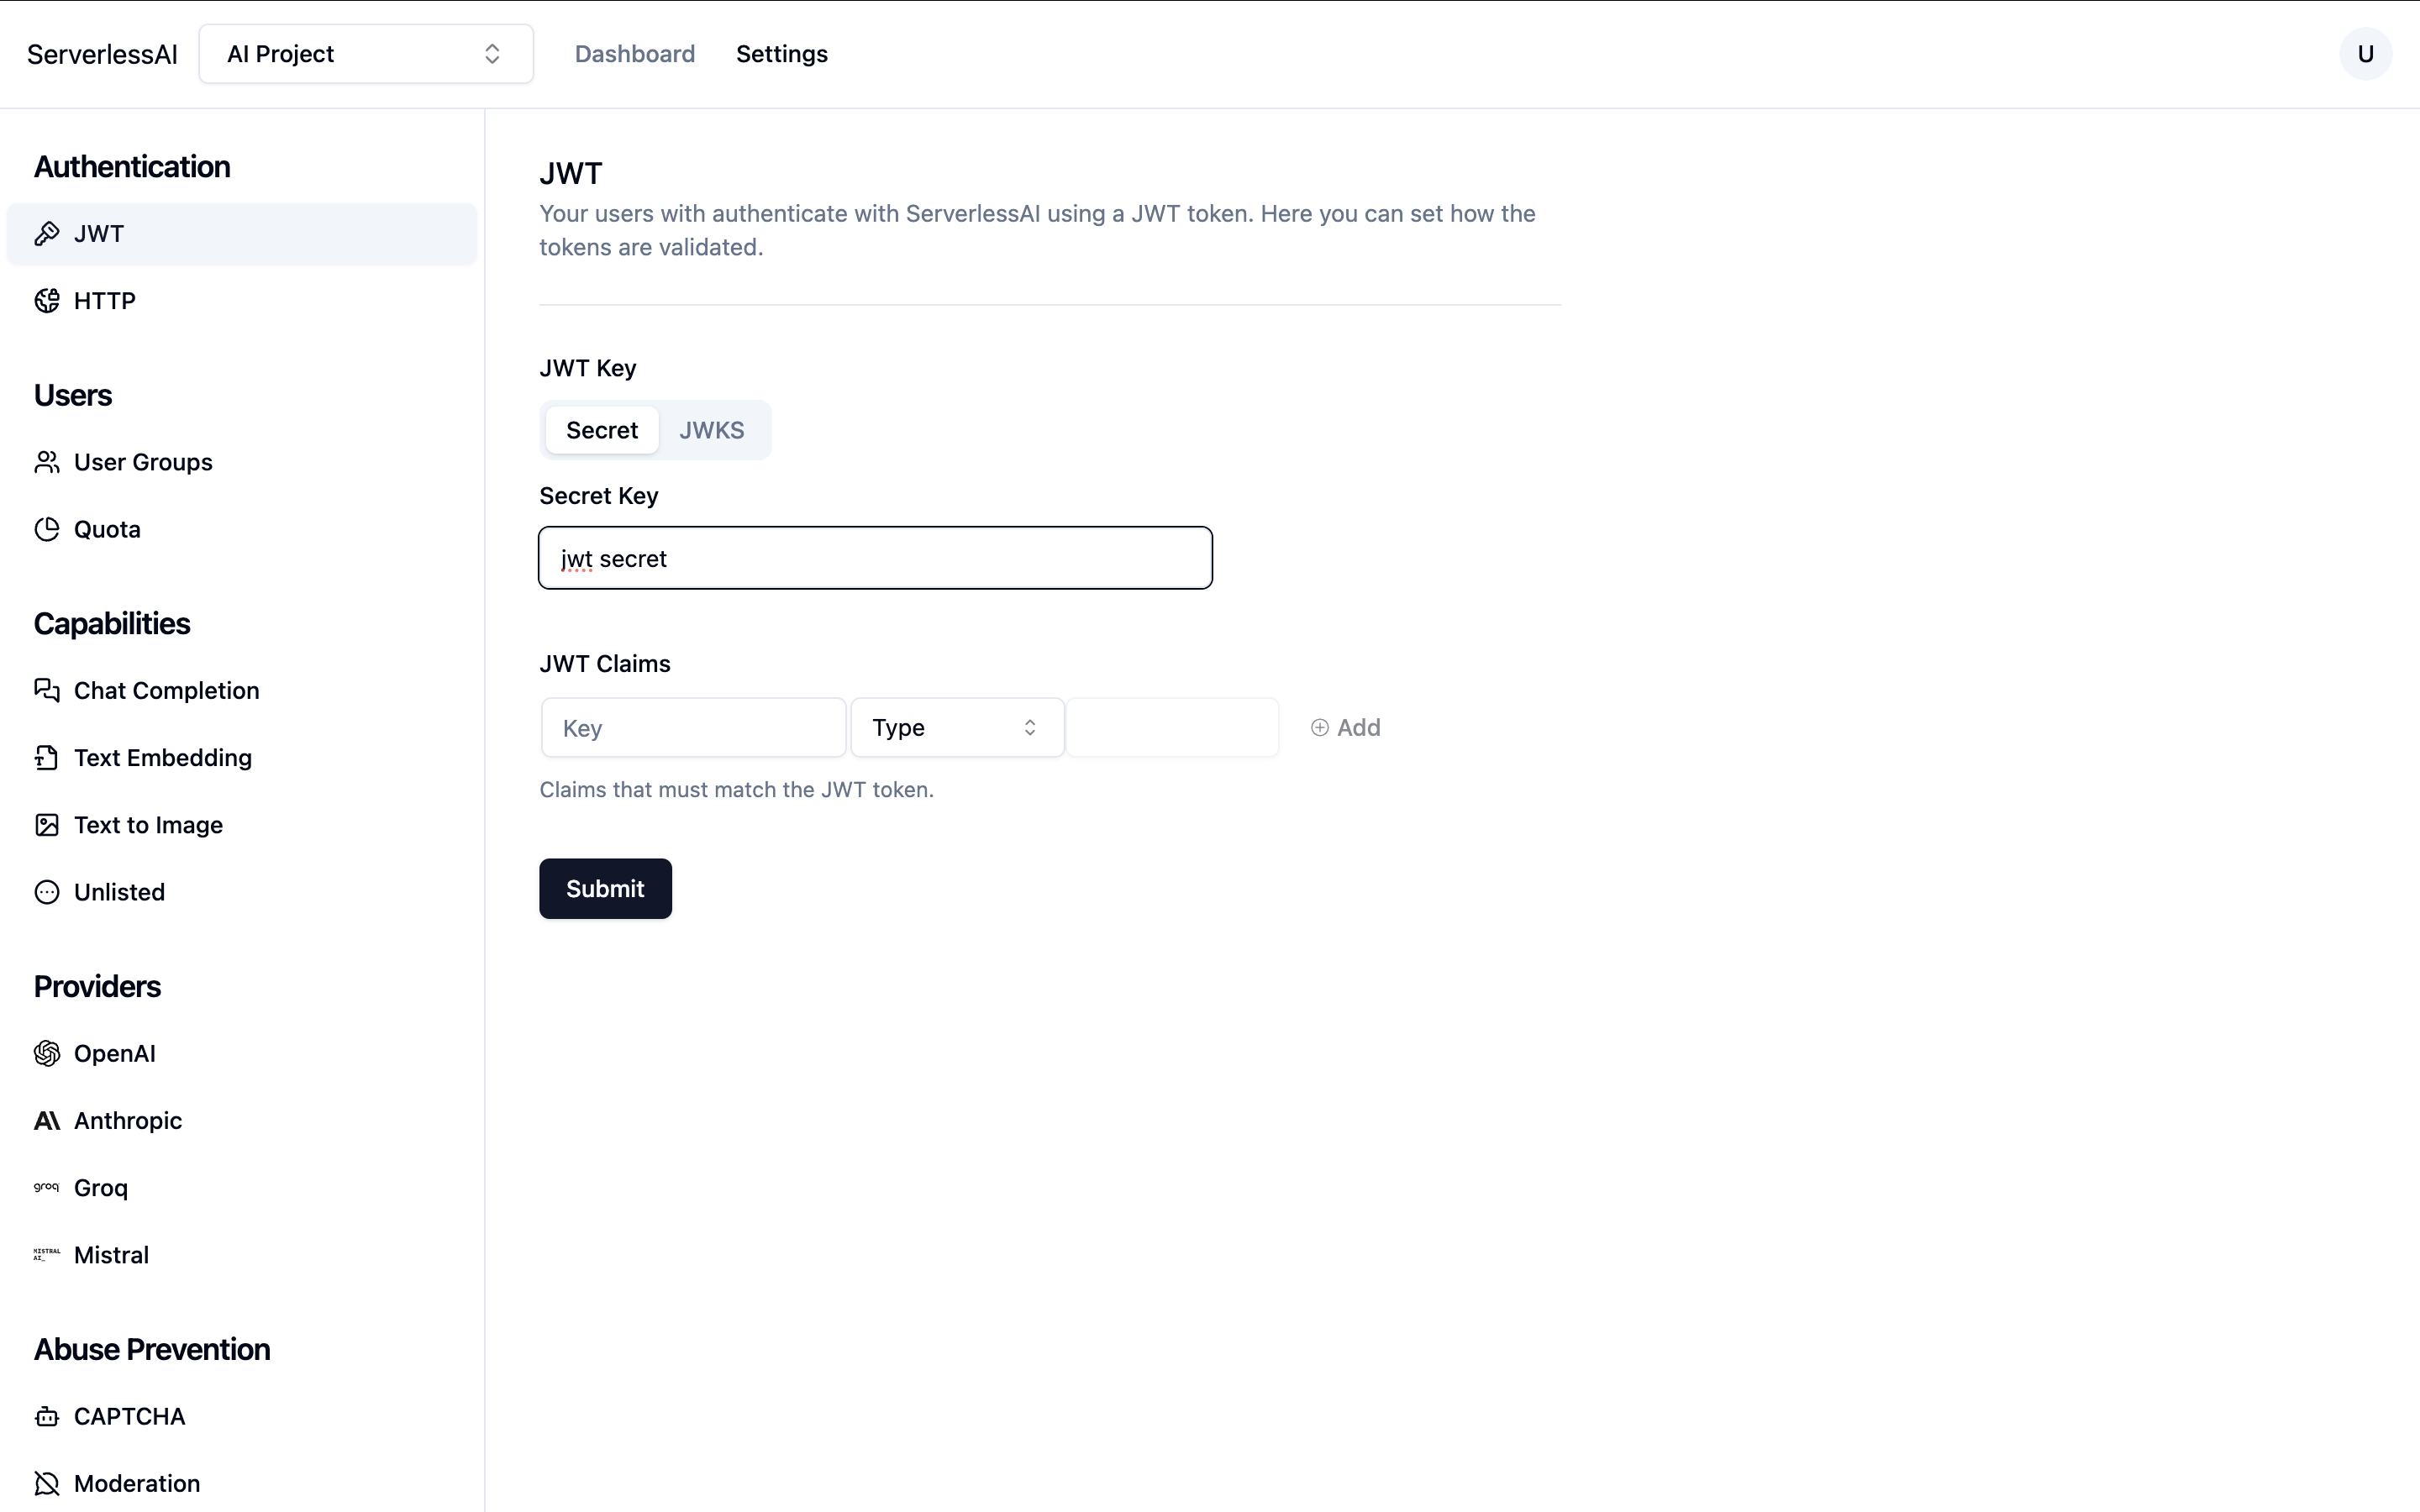
Configure Authentication
Choose "Secret" as the JWT key type and enter the JWT secret you copied from Supabase. Leave Issuer and Audience blank.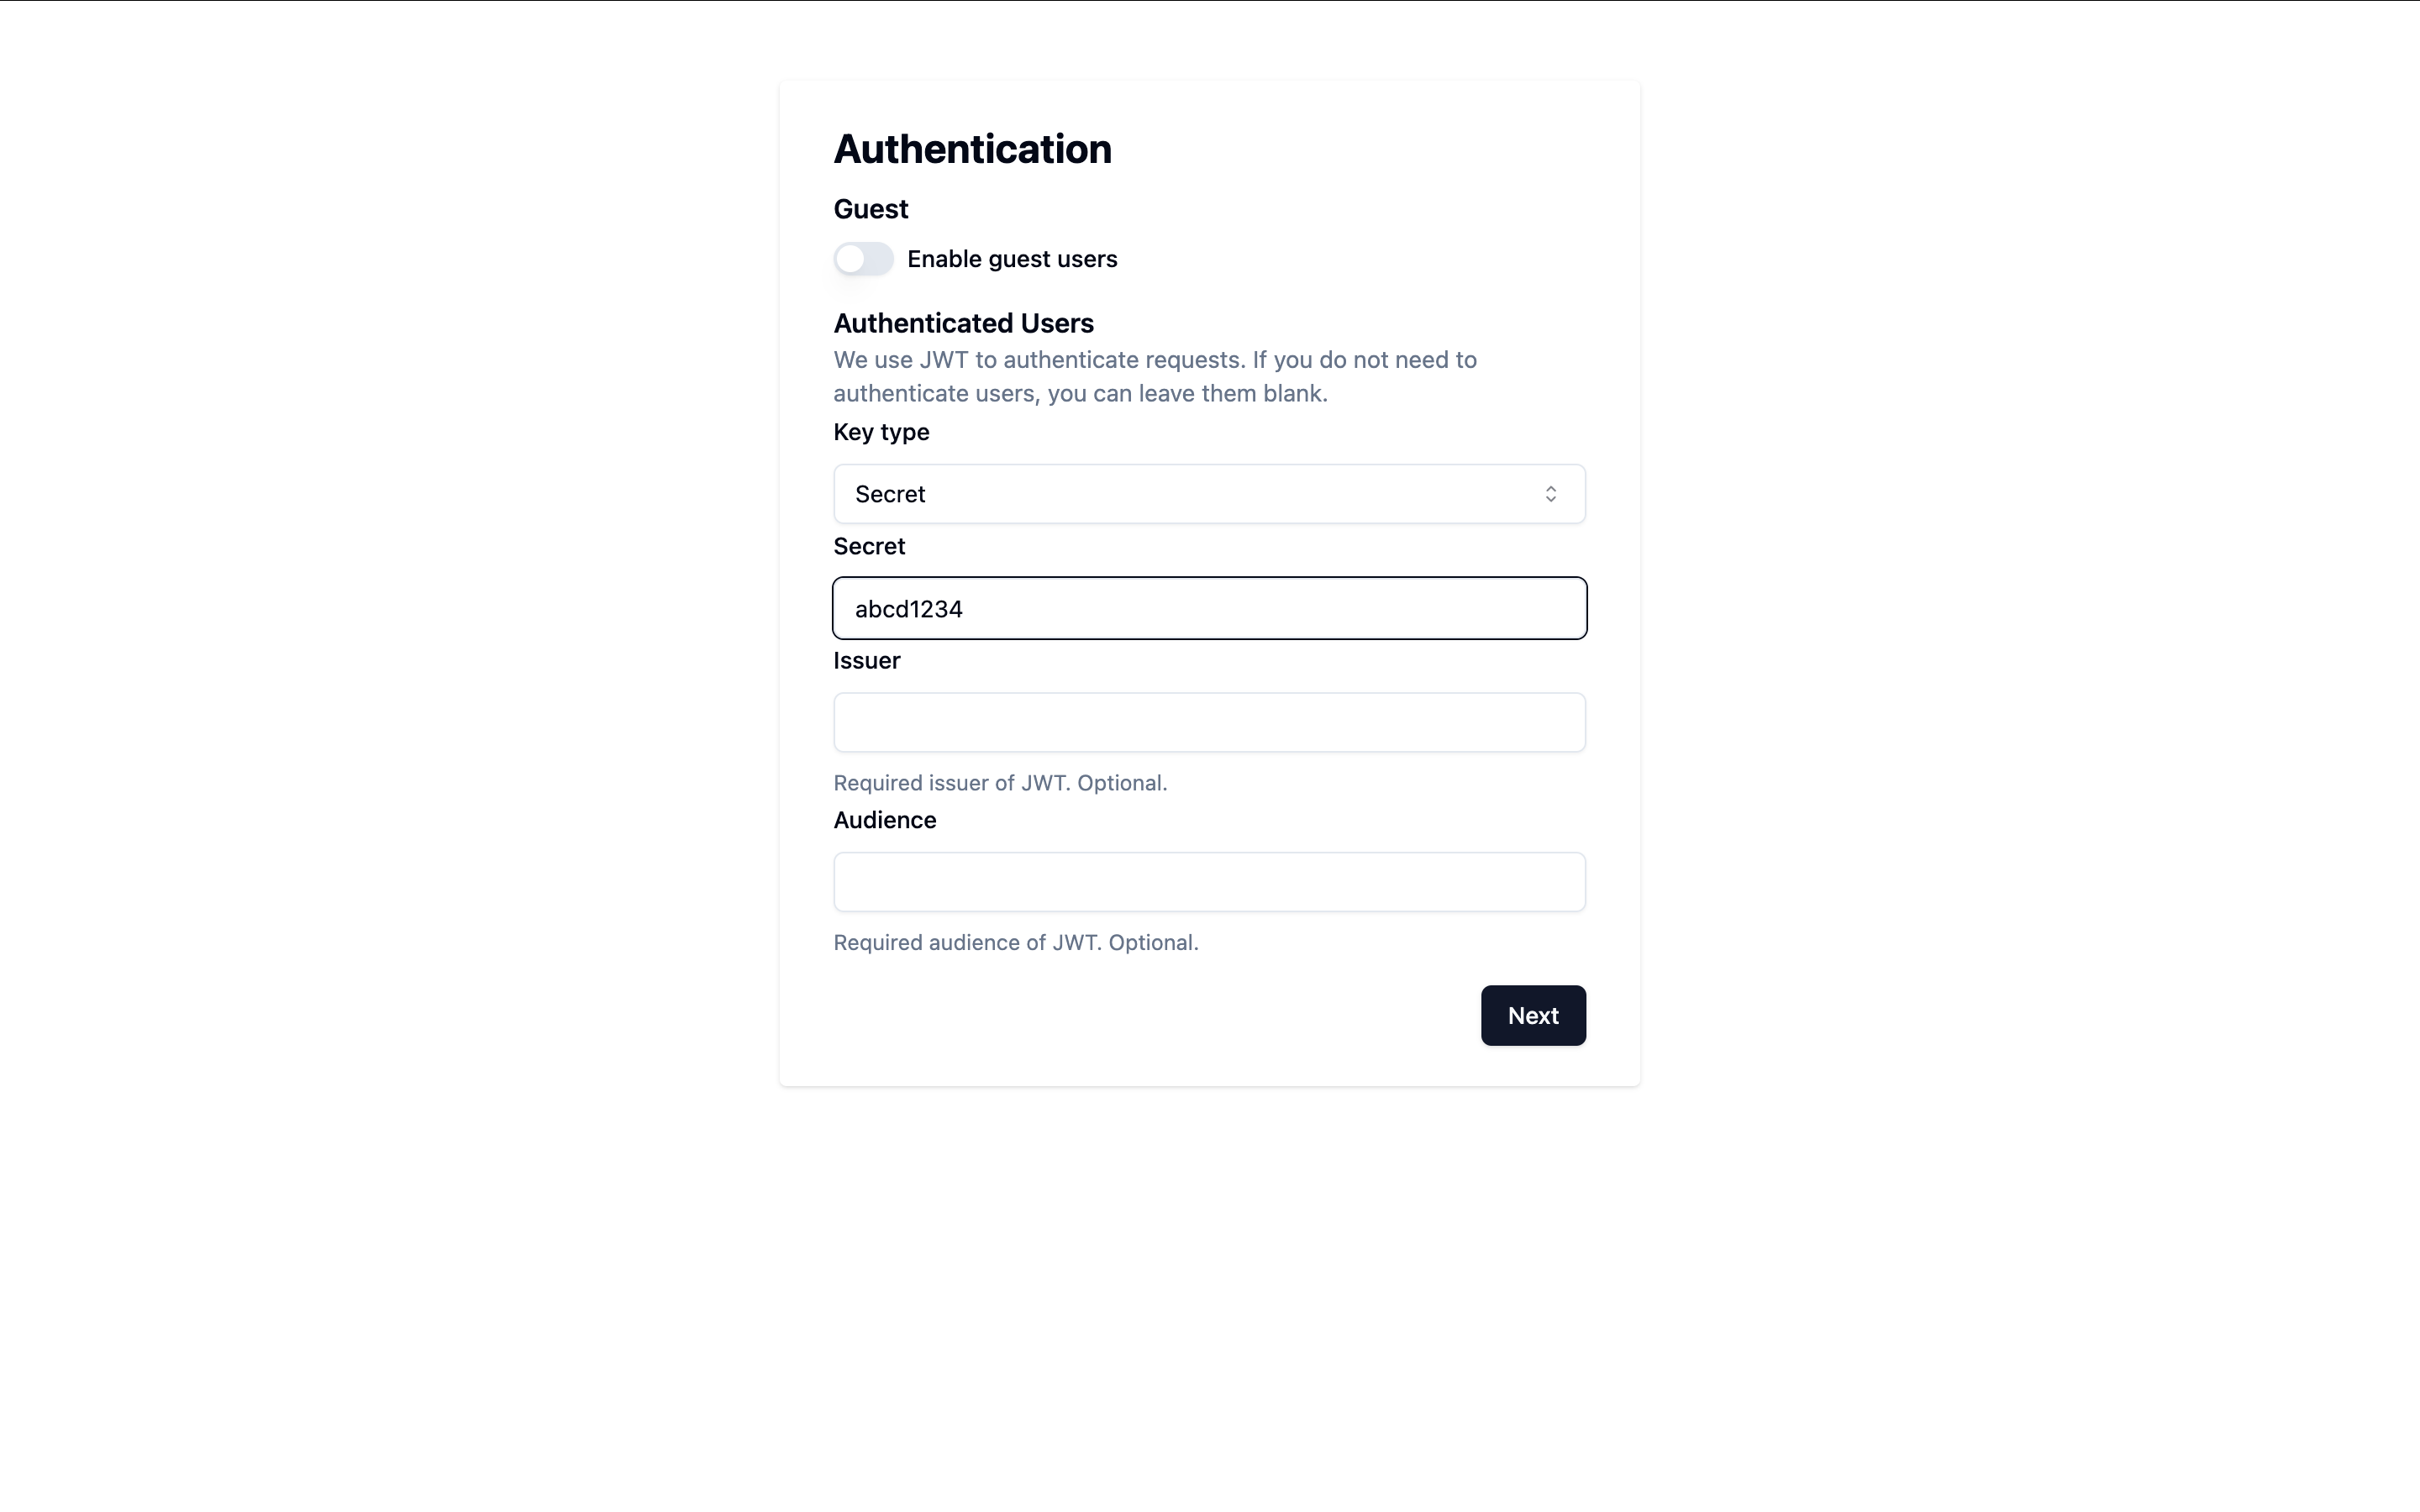
-
Set Quota (Optional)
You can configure quotas for your project or leave them blank for unlimited use since this is not a production app.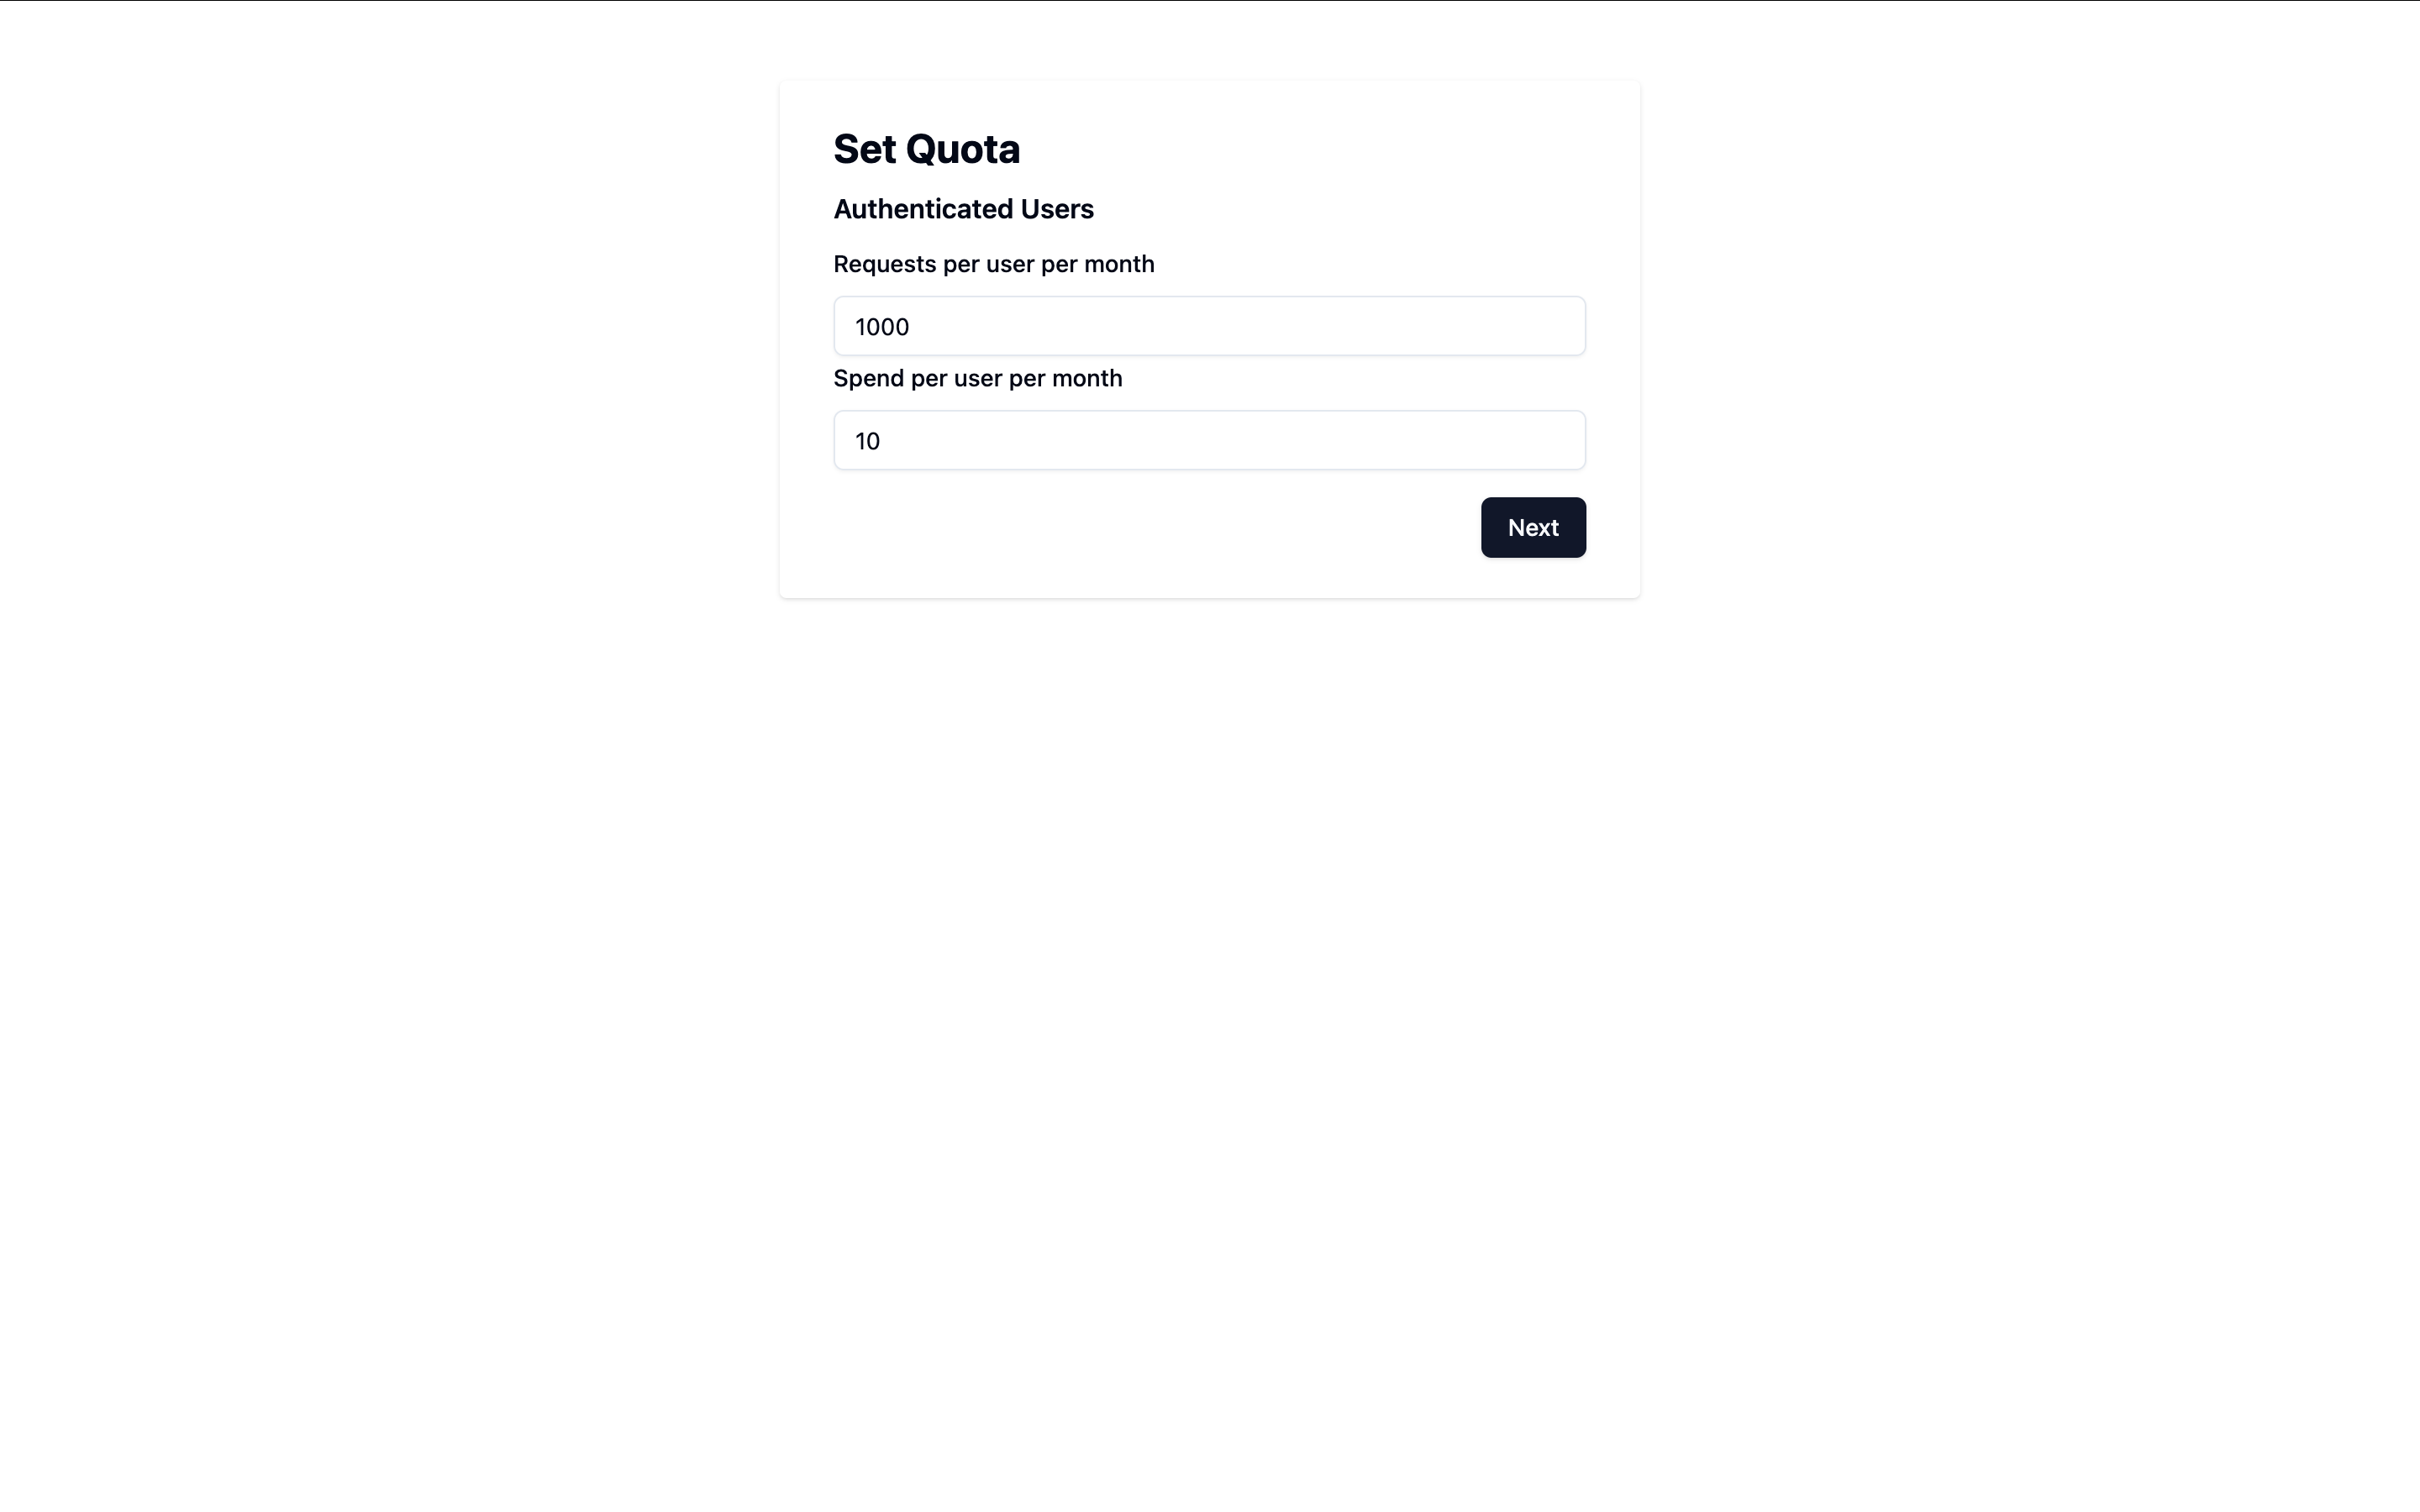
-
Complete Setup
After completing the setup, take note of your project ID.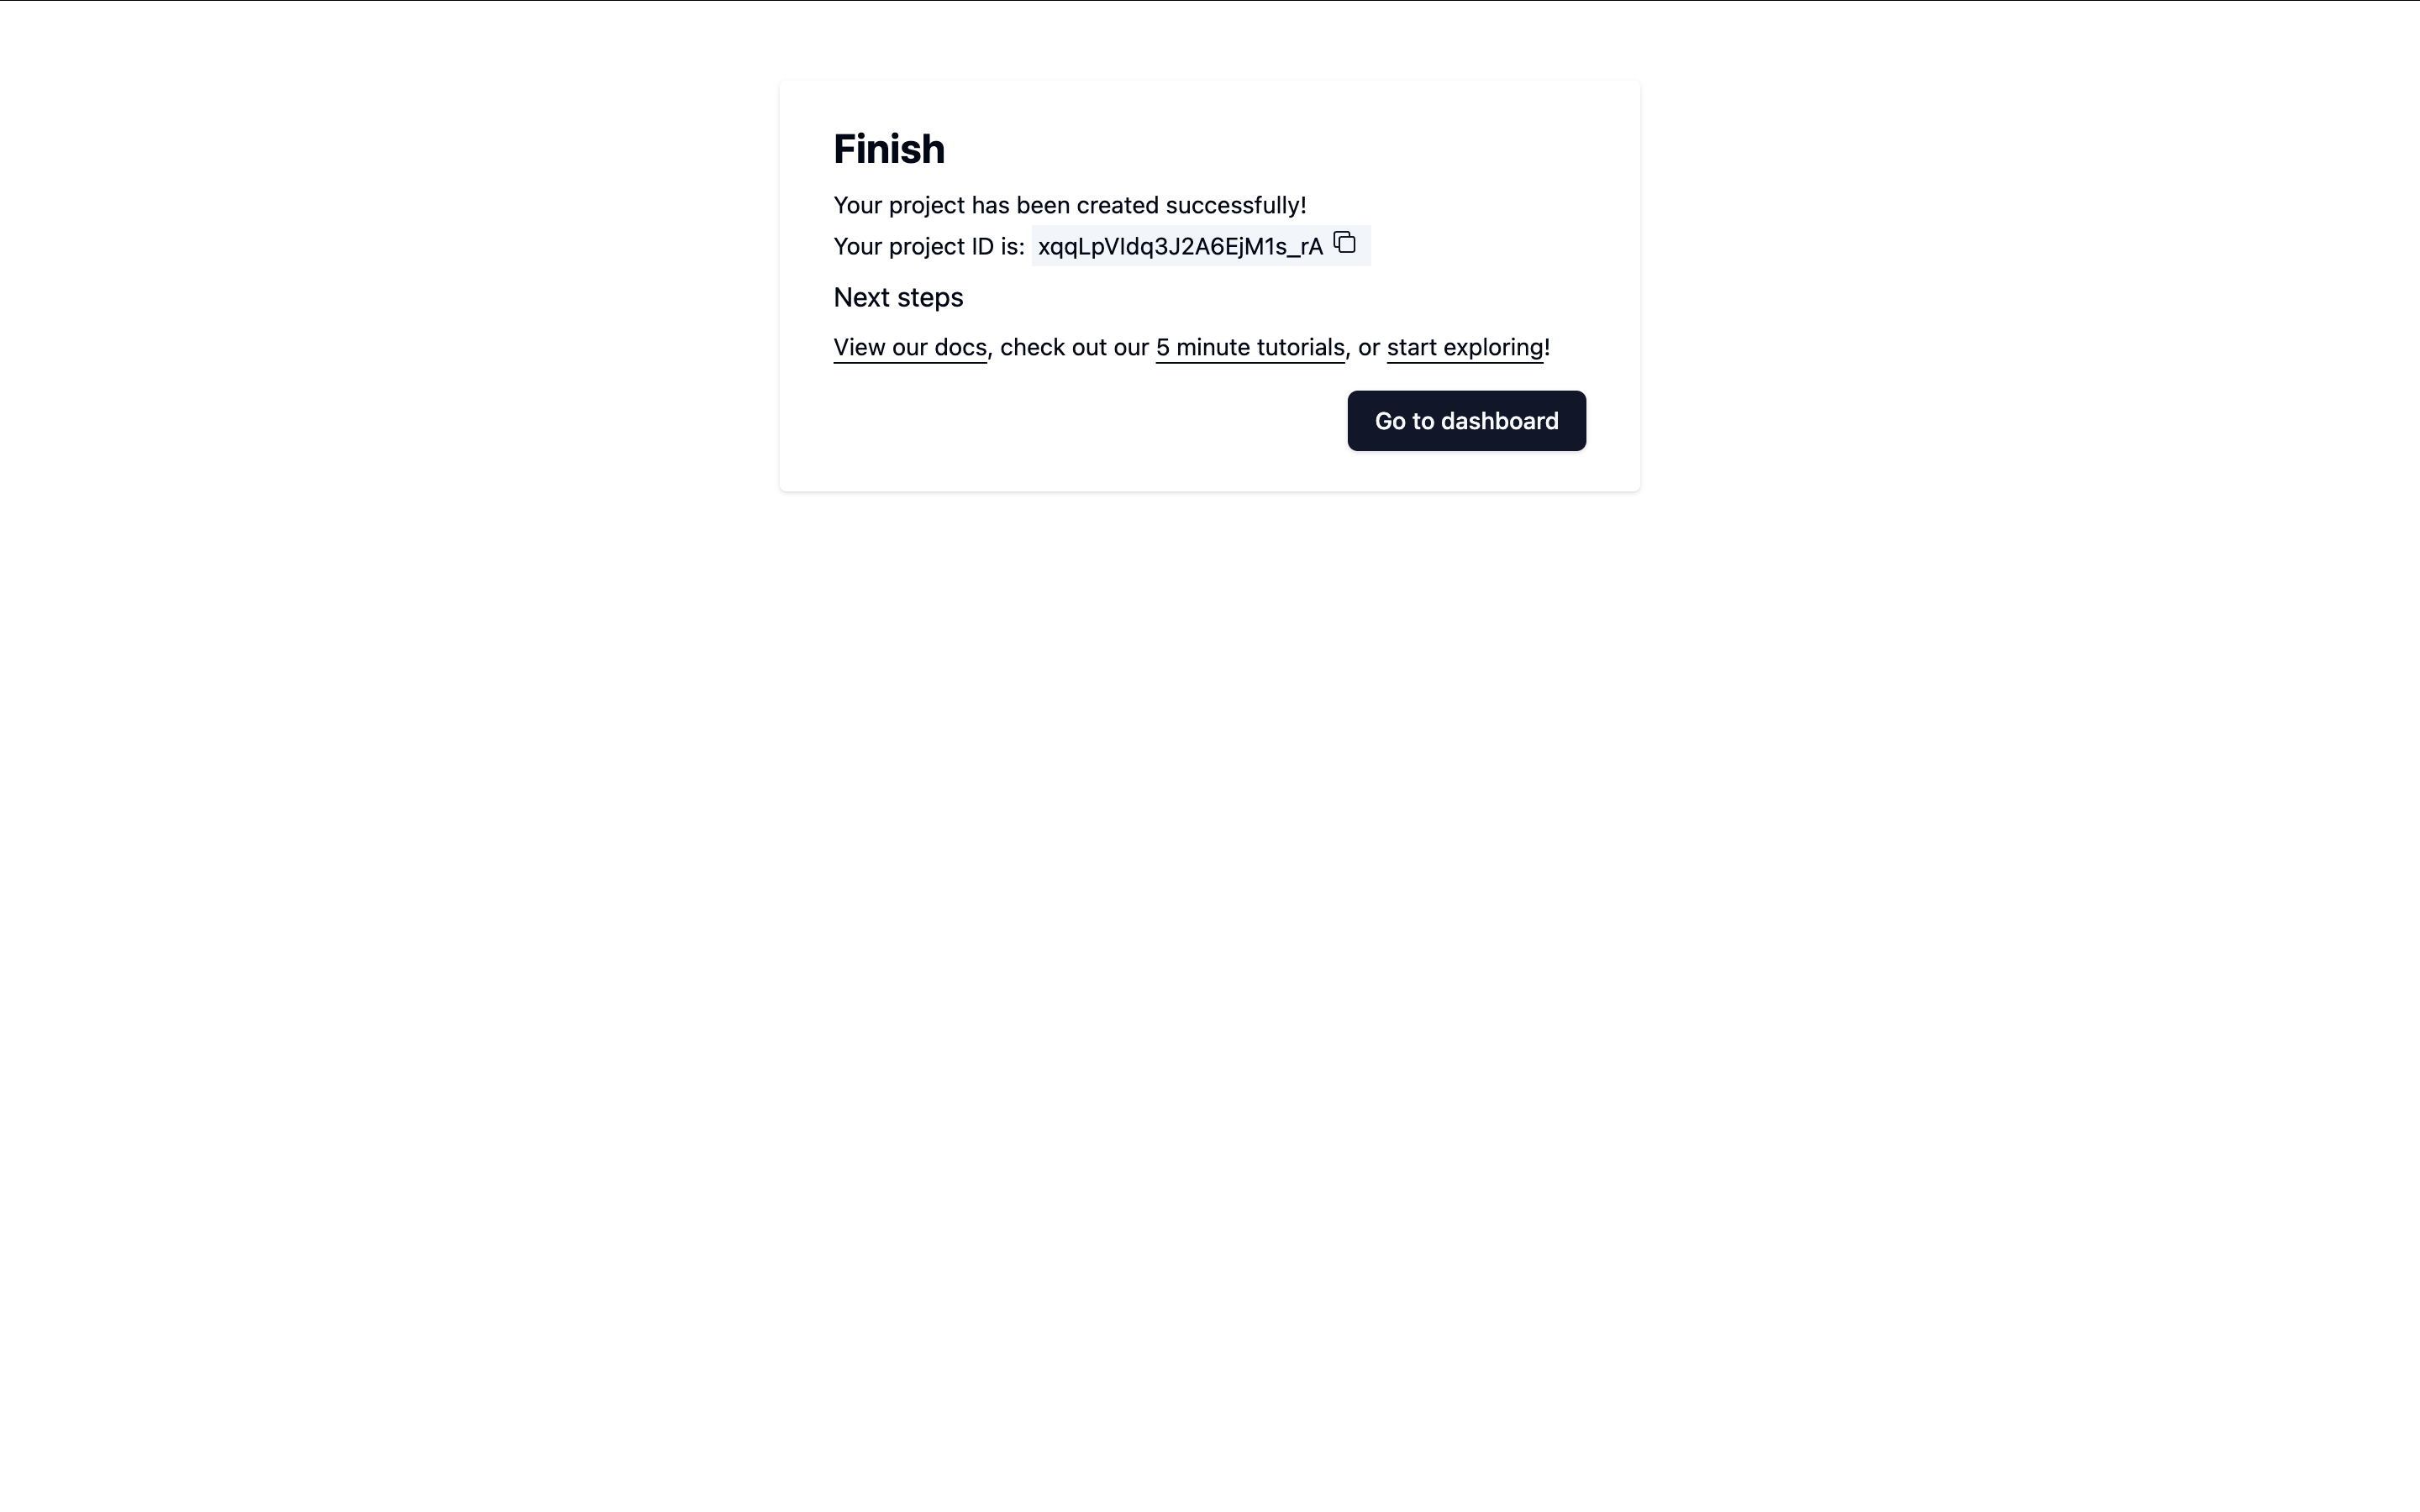
If you want to use an existing ServerlessAI project
If you've already created a project, that's great! Let's ensure it’s properly configured for this tutorial.
Navigate to the ServerlessAI Settings page.
-
JWT Configuration
- Under Authentication - JWT, select Secrets as the JWT type.
- Enter the JWT secret obtained from Supabase.
-
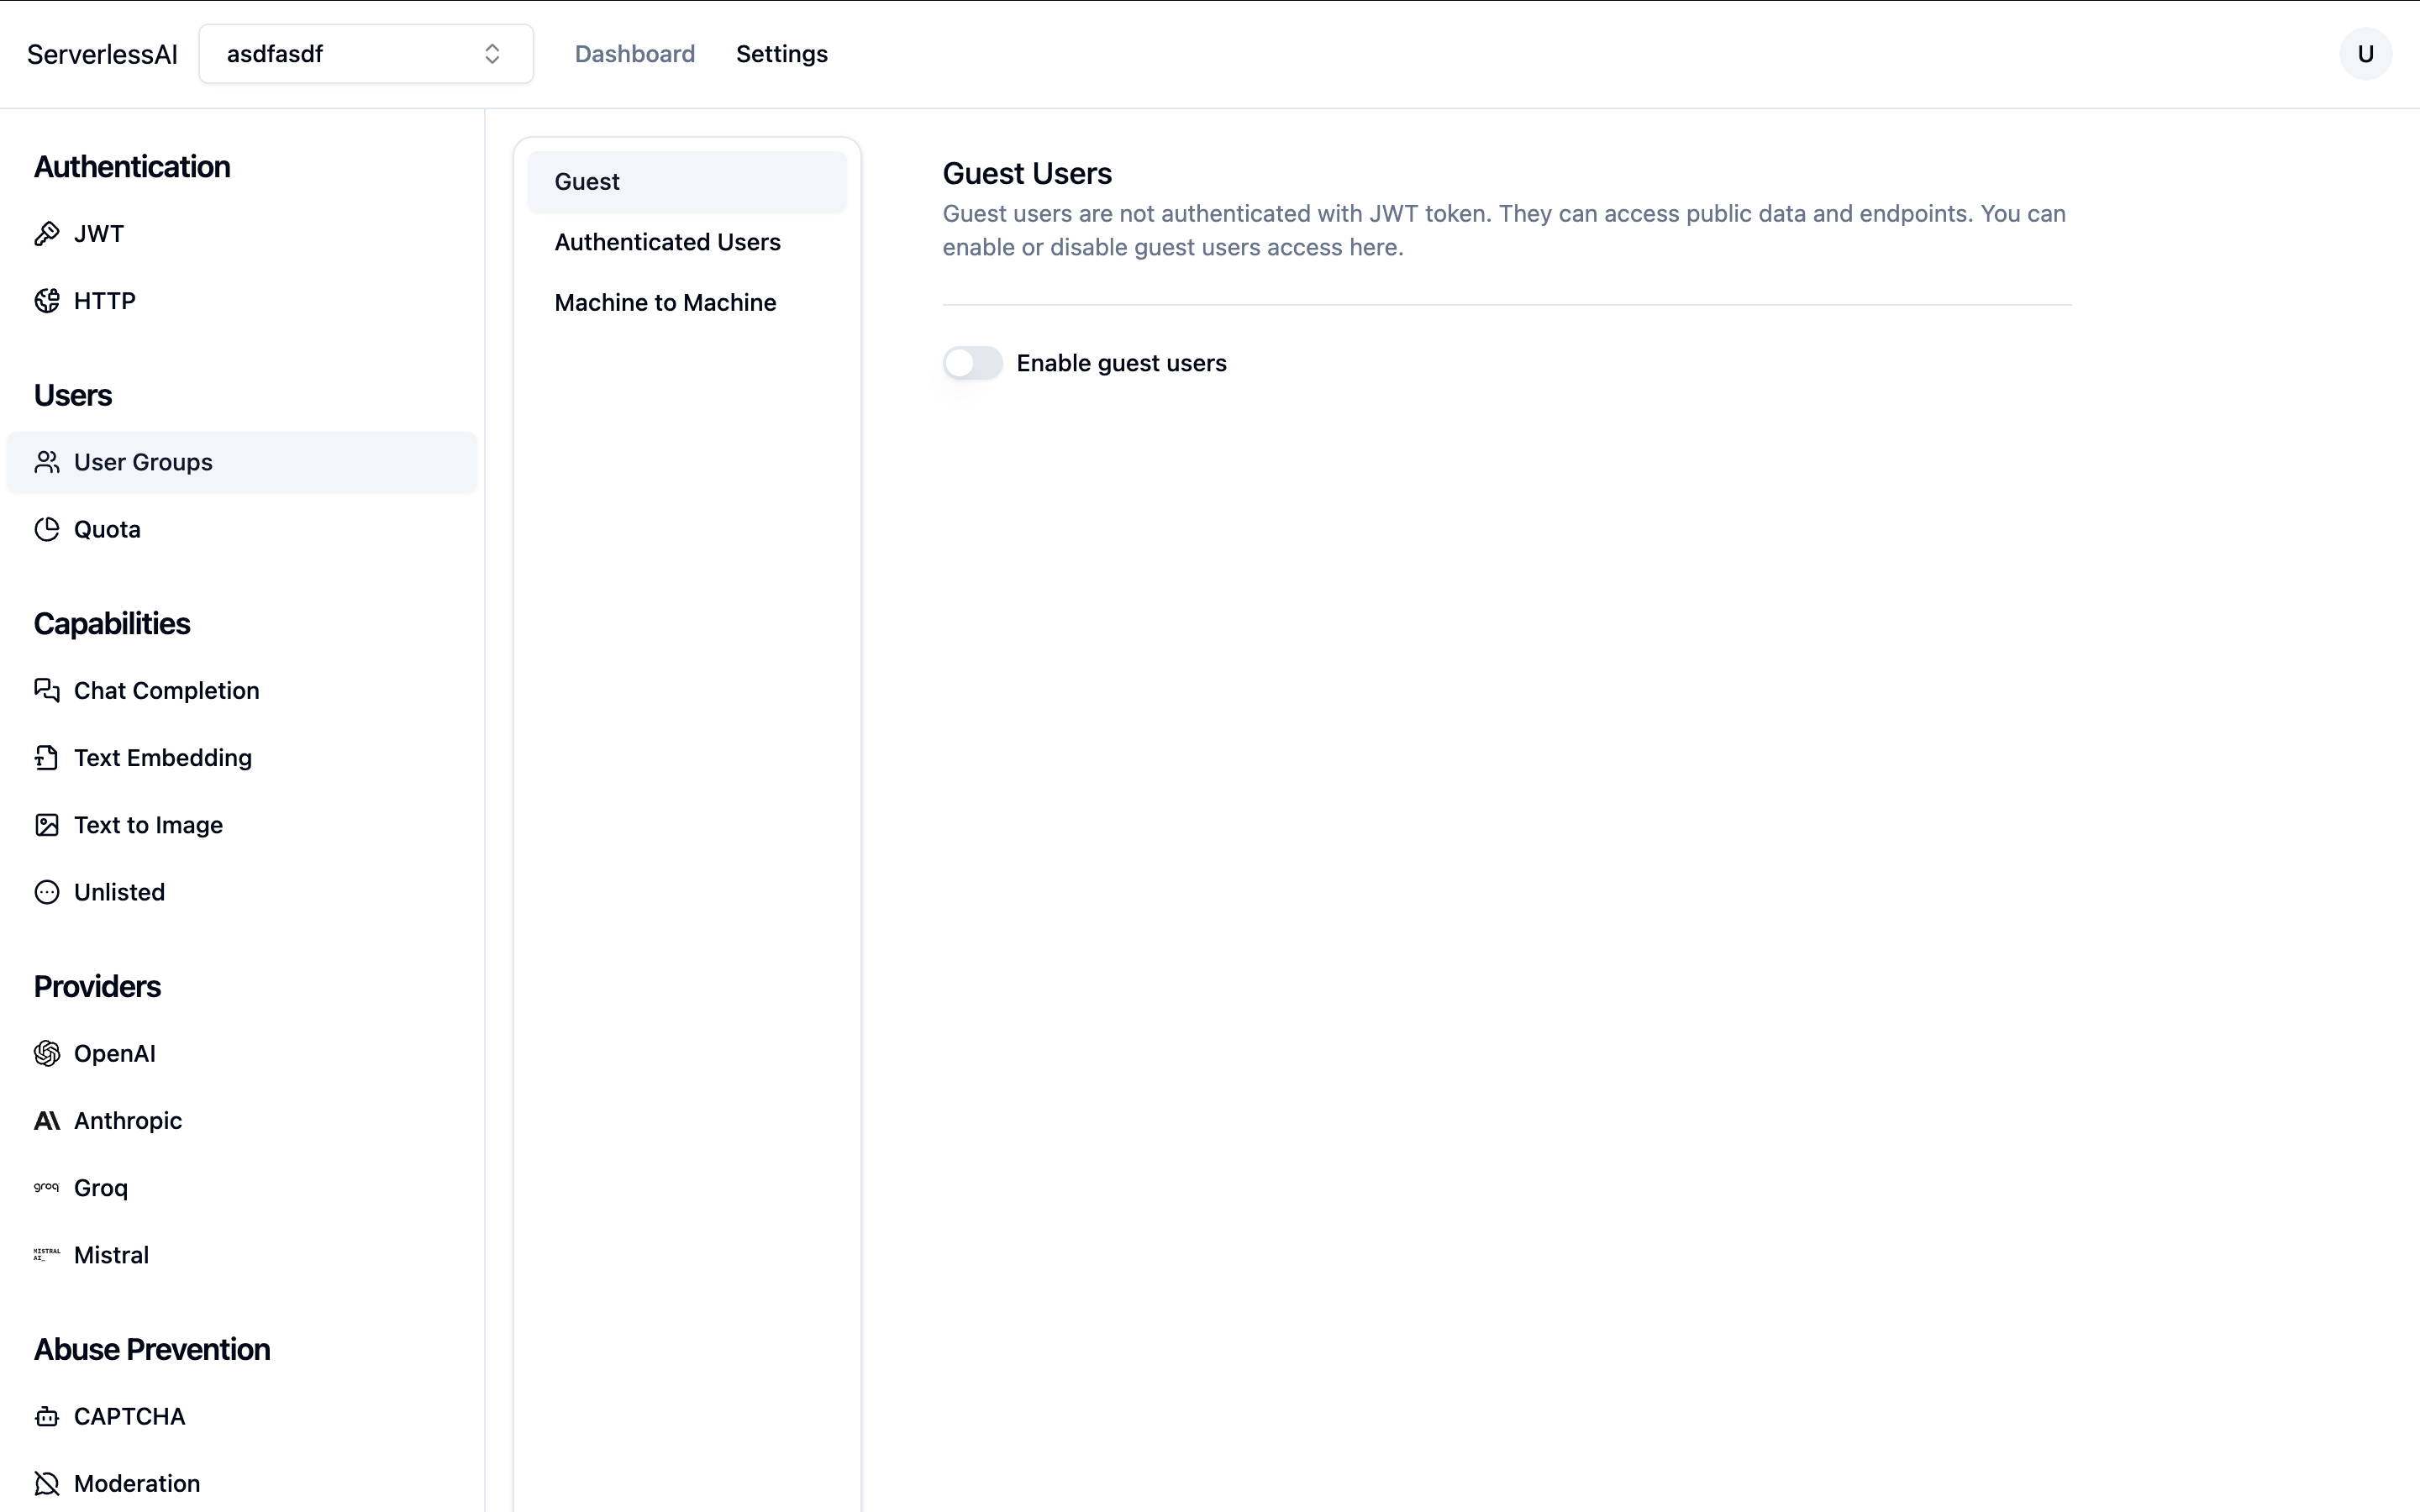
Disable Guest User
- Go to Users - User Groups - Guest.
- Ensure the guest user is disabled.
-
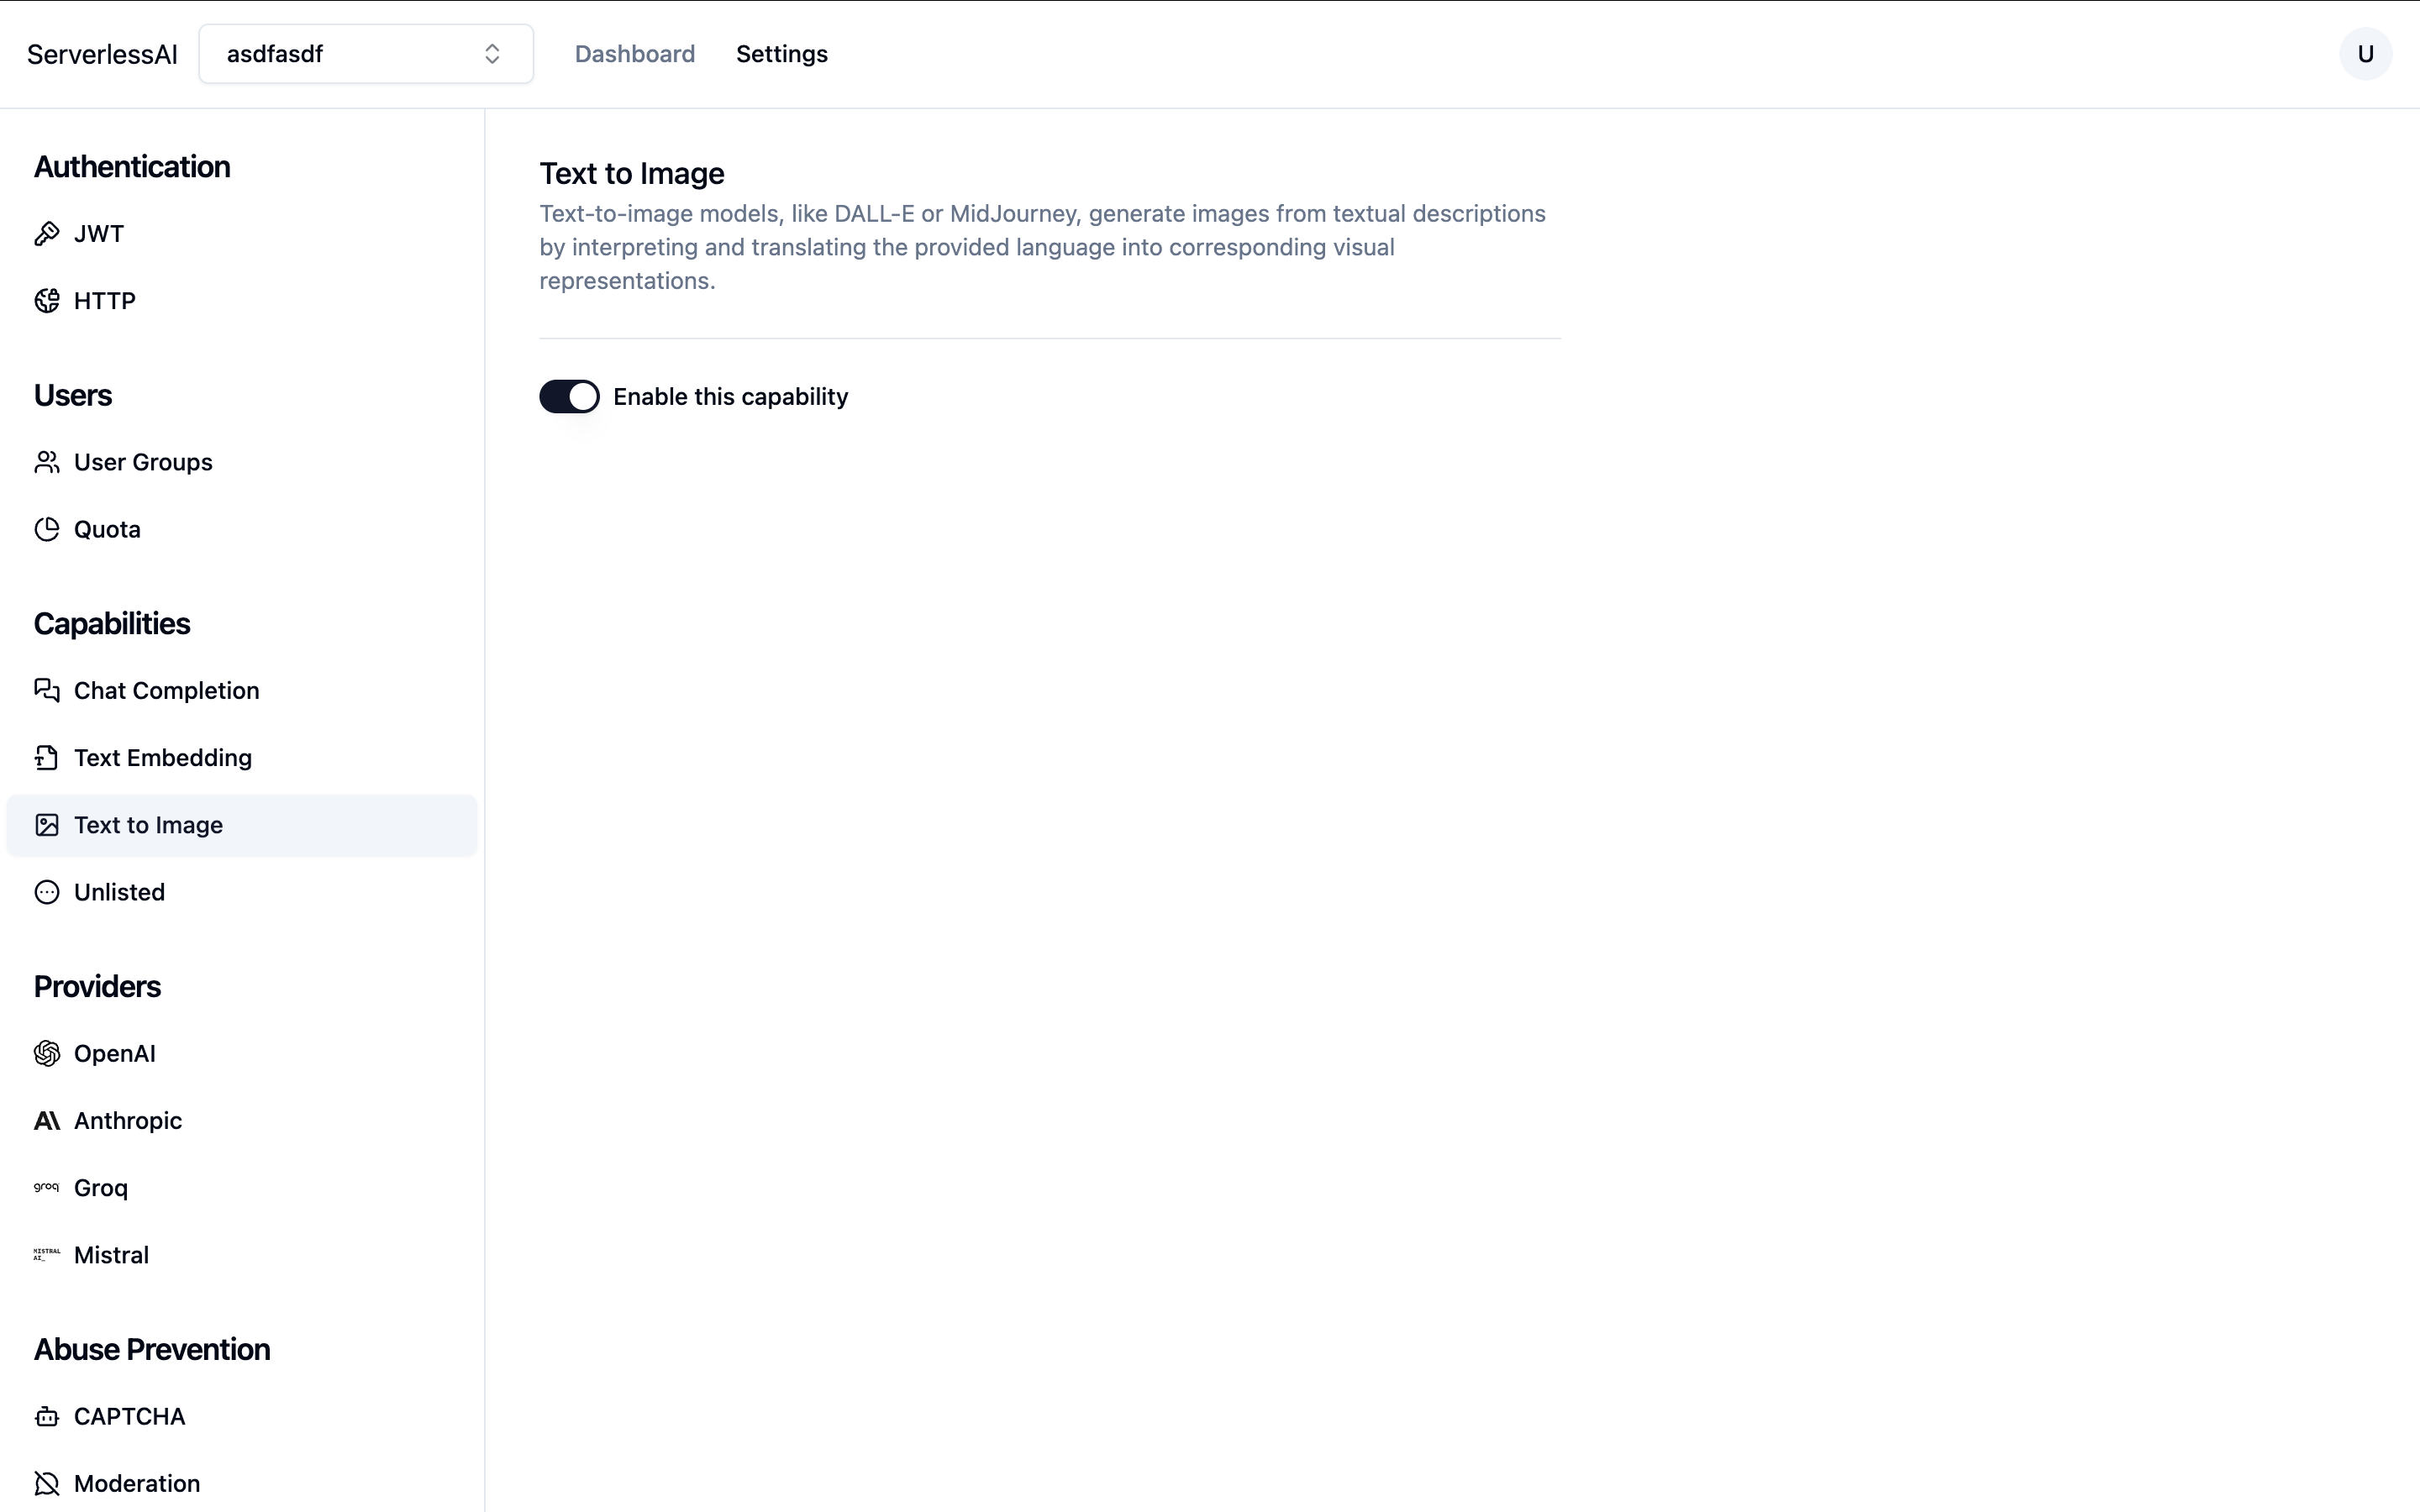
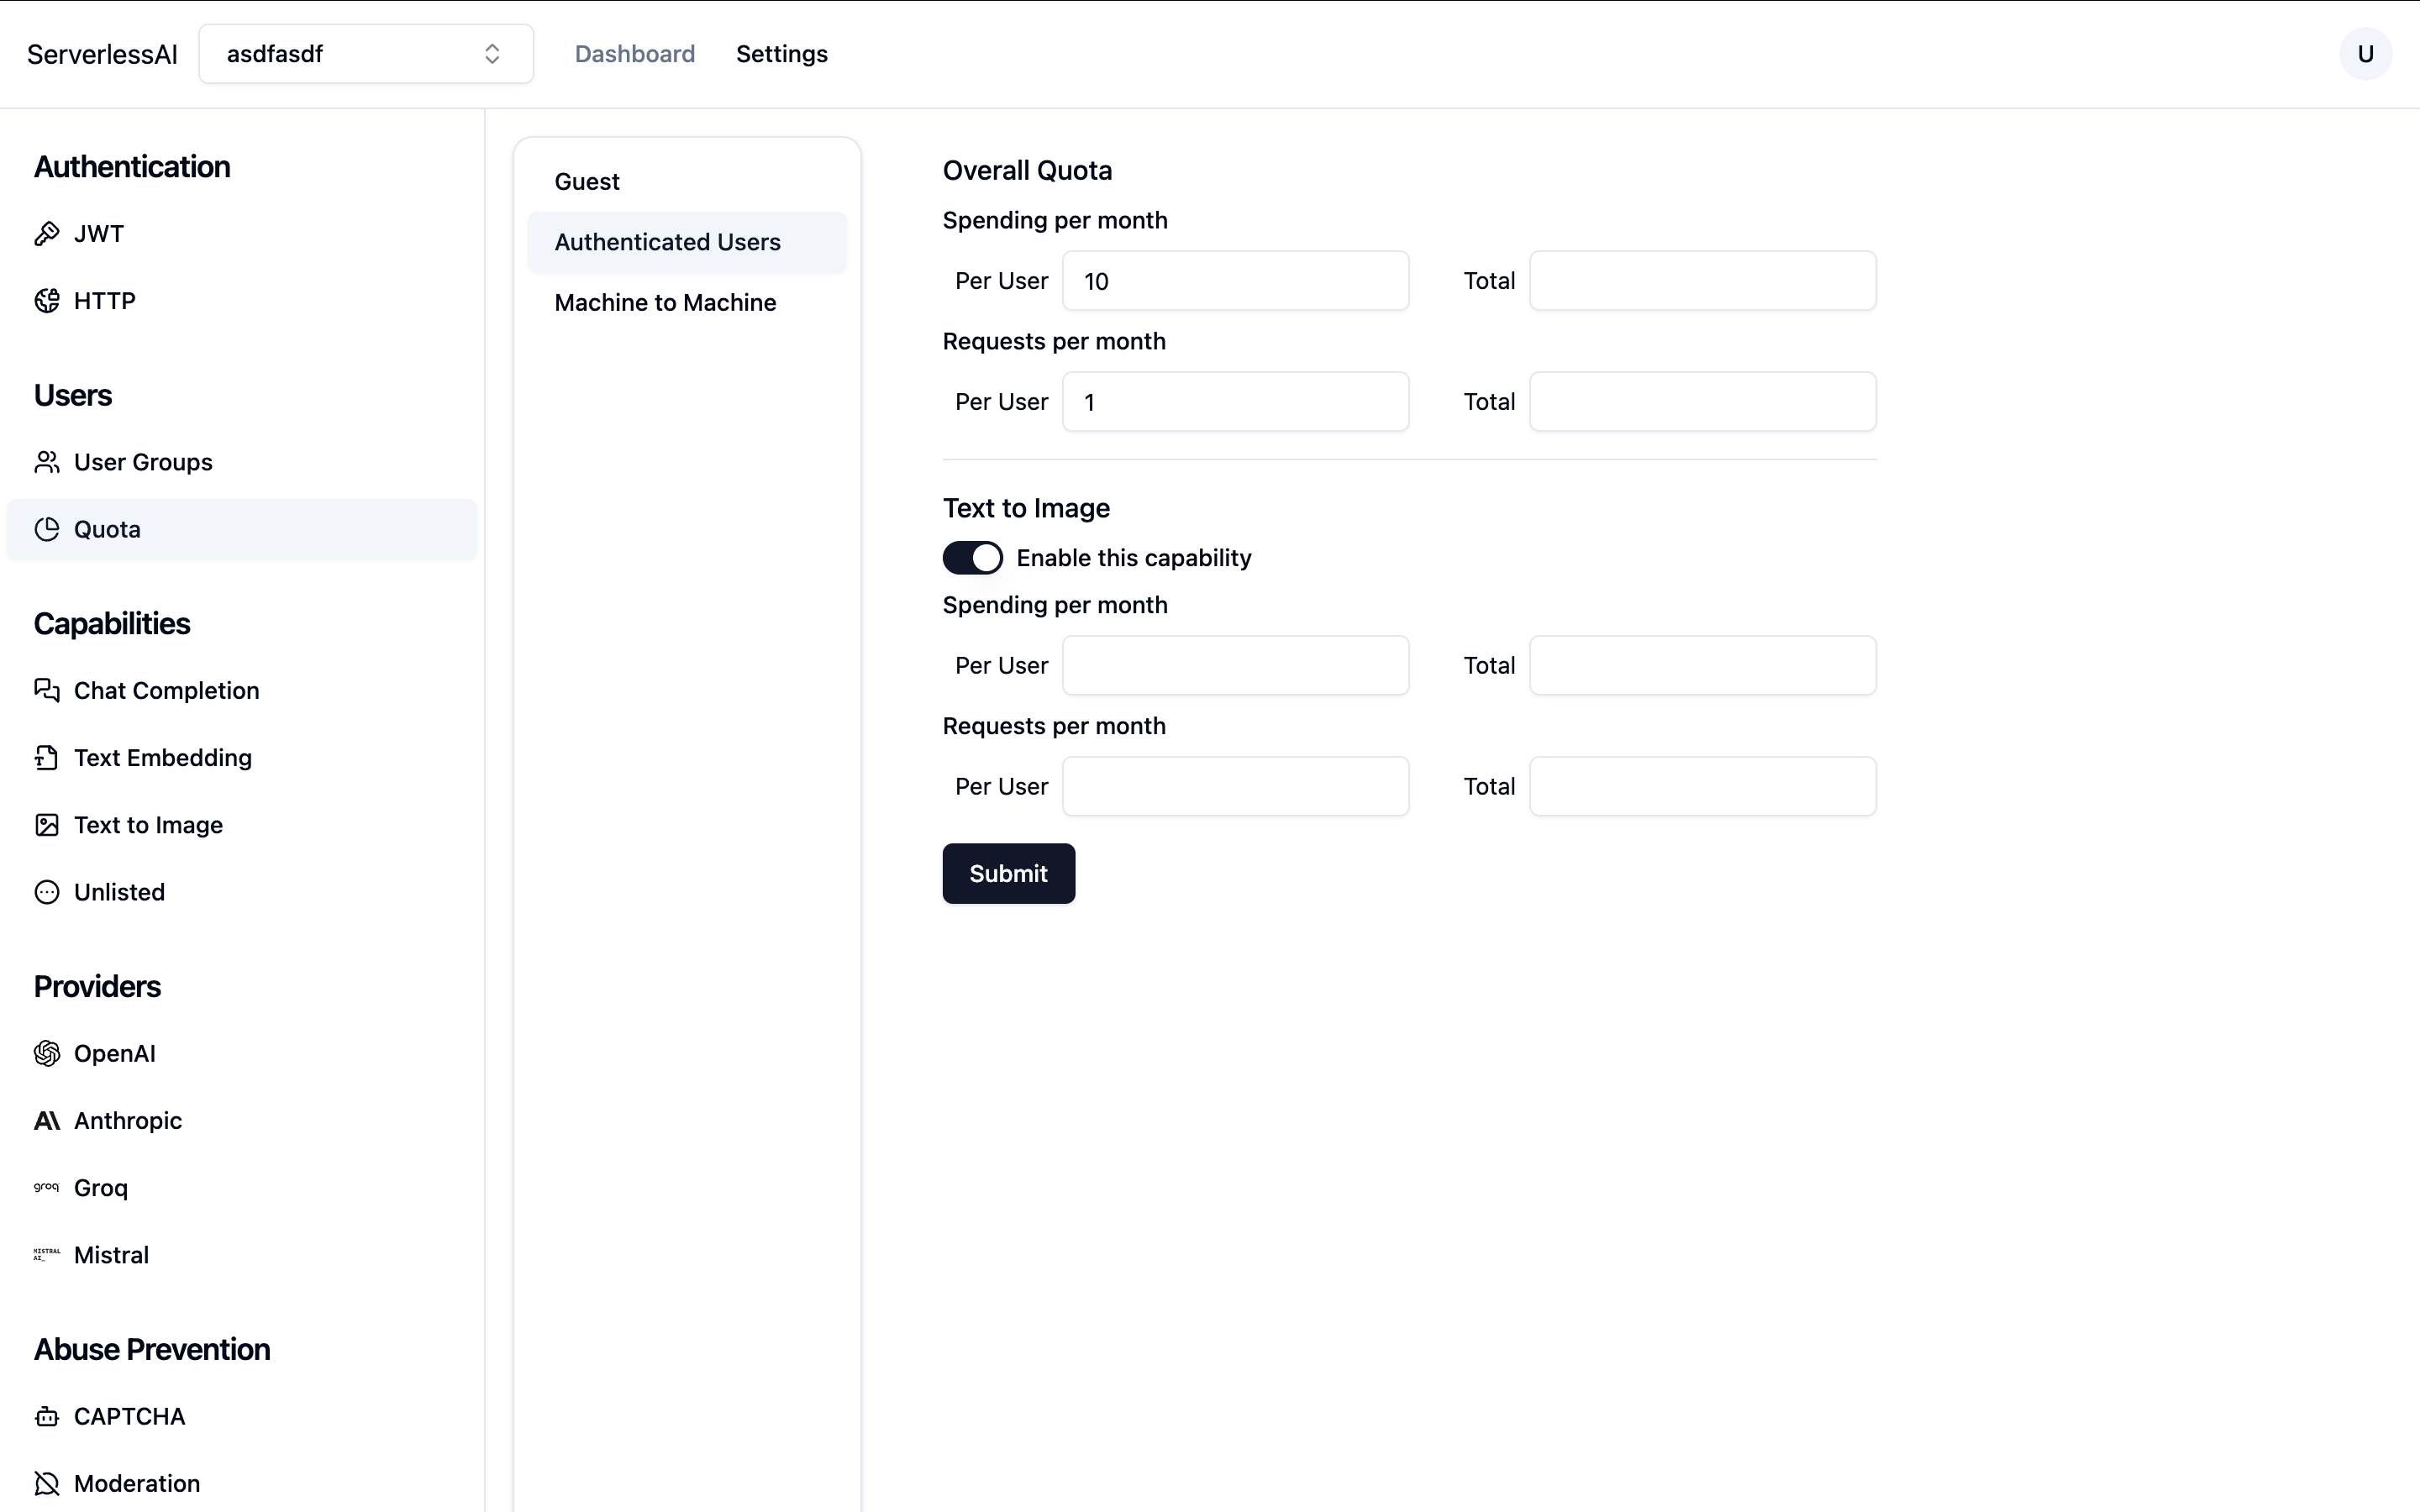
Enable Text-to-Image Capability
- In Capabilities - Text to Image, ensure the capability is enabled.
- Next, enable this capability for user groups:
- Go to Users - Quota, select Authenticated Users, and enable the Text to Image capability.
- Optionally, set a usage quota.
-
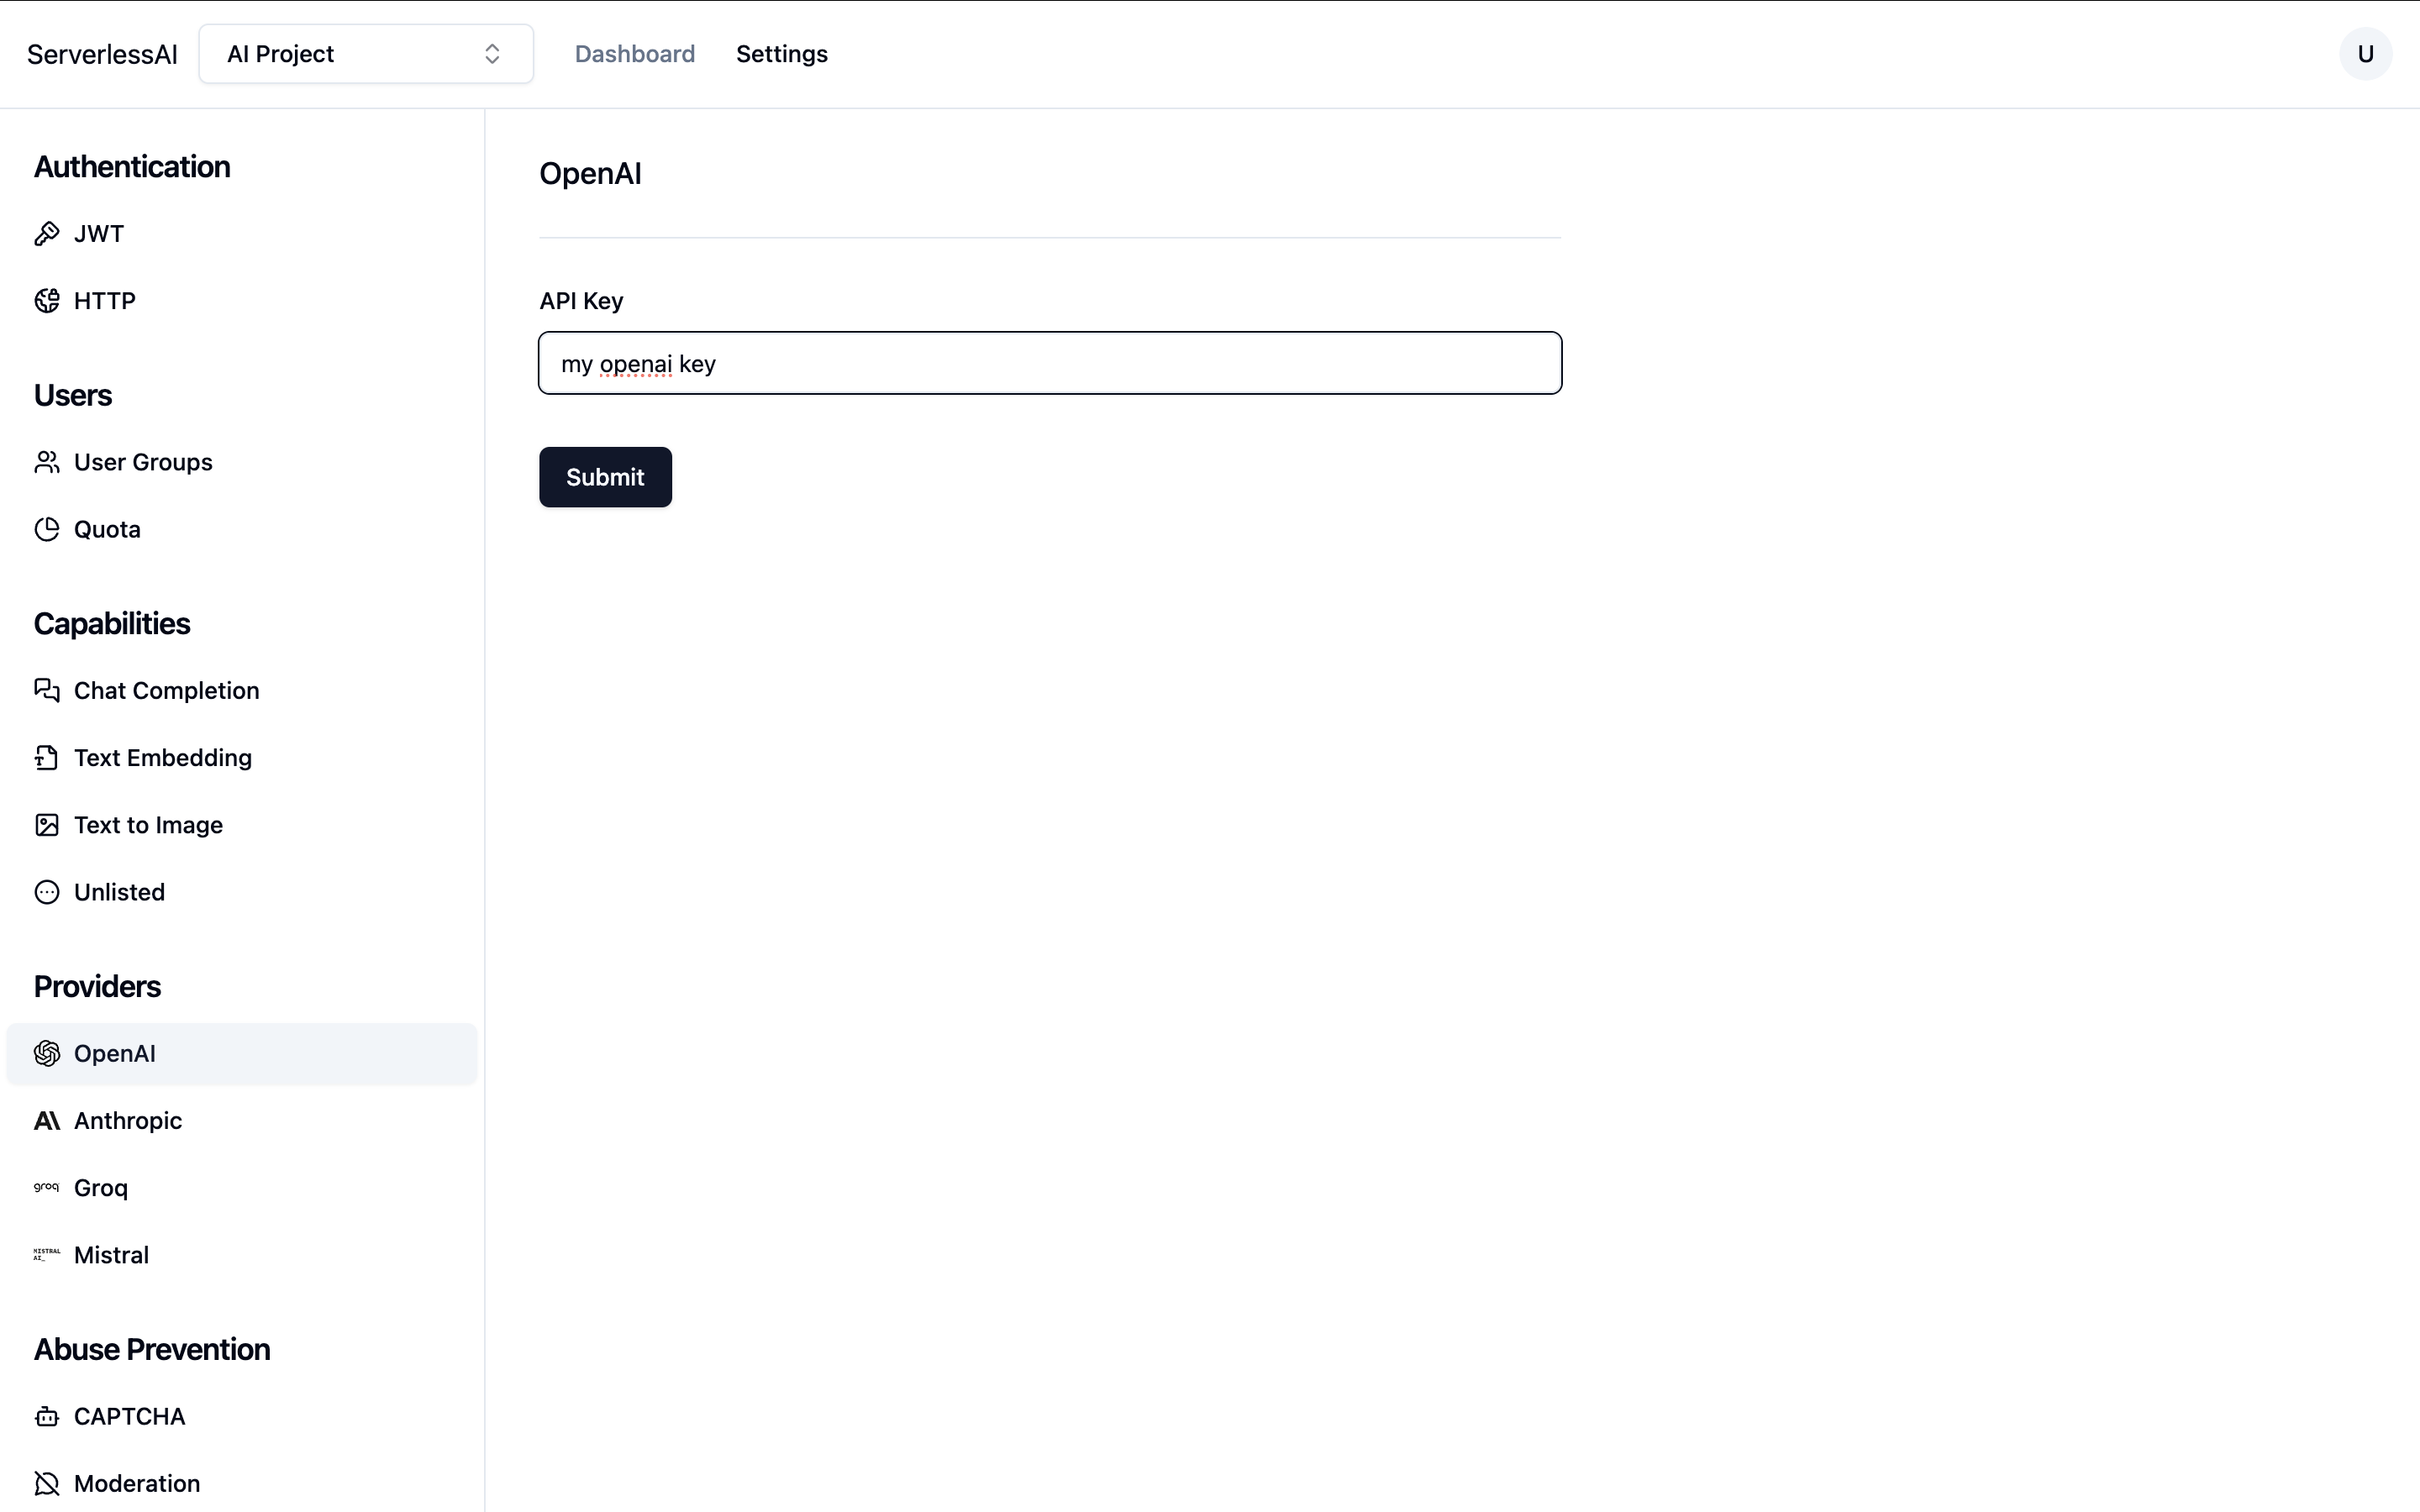
Configure OpenAI API Key
- Under Providers - OpenAI, enter your OpenAI API key.
Creating the Next.js App Skeleton
-
Initialize the Next.js App
Run the following command to create your app:npx create-next-app -e with-supabase -
Configure Environment Variables
Rename.env.exampleto.envand add your Supabase project'sanonkey and URL. -
Install the OpenAI API Client
Run the following command to install the OpenAI client:npm install --save openai
Building the Image Generator Component
Create the ImageGen Component
-
Create a file called
components/ImageGen.tsx. Add a"use client"directive."use client"; -
We will need to fetch the user's session when the component loads. Add the following code to the file:
function useSession(supabase: SupabaseClient) {
  const [session, setSession] = useState<Session | null>(null);

  useEffect(() => {
    (async () => {
      const { data: session } = await supabase.auth.getSession();

      setSession(session?.session);
    })();
  }, []);

  return session;
} -
We also want to fetch images the user generated before. Add the following code:
interface GeneratedImage {
  prompt: string;
  image_b64: string;
}

function usePastImages(supabase: SupabaseClient) {
  const [pastImages, setPastImages] = useState<GeneratedImage[]>([]);

  useEffect(() => {
    (async () => {
      const { data: pastImages } = await supabase
        .from("generated_images")
        .select("*")
        .order("created_at", { ascending: false });

      if (pastImages) {
        setPastImages(
          pastImages.map((row) => ({
            prompt: row.prompt || "",
            image_b64: row.image || "",
          }))
        );
      }
    })();
  }, []);

  const addPastImage = useCallback(
    (image: GeneratedImage) => setPastImages((s) => [image, ...s]),
    []
  );

  return [pastImages, addPastImage] as const;
} -
Now let's create an OpenAI client. Add the following code, making sure you plug in your ServerlessAI project ID:
const PROJECT_ID = "<Your Project ID>";

function useOpenAI(accessToken: string) {
  return useMemo(
    () =>
      new OpenAI({
        baseURL: "https://openai.api.serverlessai.dev/v1",
        apiKey: `${PROJECT_ID}:${accessToken || ""}`,
        dangerouslyAllowBrowser: true,
      }),
    [accessToken]
  );
} -
Now let's add the skeleton of the component
export default function ImageGen() {
  const supabase = useMemo(createClient, []);

  const session = useSession(supabase);

  const openai = useOpenAI(session?.access_token || "");

  const [pastImages, addPastImage] = usePastImages(supabase);

  const [currentPrompt, setCurrentPrompt] = useState("");
  const [loading, setLoading] = useState(false);
  const [currentImage, setCurrentImage] = useState<GeneratedImage | null>(null);

  const onClick = () => {};

  return (
    <div className="container mx-auto">
      <h1 className="text-lg">Pop Art Generator</h1>
      <div className="flex items-center">
        <input
          className="rounded-md h-10 text-sm px-4 py-2 bg-inherit border"
          placeholder="Enter your prompt..."
          type="text"
          value={currentPrompt}
          onChange={(e) => setCurrentPrompt(e.currentTarget.value)}
          disabled={loading}
        />
        <button
          className="py-2 px-2 rounded-md no-underline bg-btn-background hover:bg-btn-background-hover"
          disabled={!currentPrompt || loading}
          onClick={onClick}
        >
          Send
        </button>
      </div>

      <div>
        {currentImage && (
          <img
            src={`data:image/png;base64,${currentImage.image_b64}`}
            alt={currentImage.prompt}
          />
        )}
        {loading && (
          <div className="w-[256px] h-[256px] flex items-center justify-center">
            <div>Loading...</div>
          </div>
        )}
      </div>

      <div className="mt-4">
        <h2>Past Images</h2>
        <div className="flex flex-wrap">
          {pastImages.map((image, index) => (
            <div className="mb-2 mr-2" key={index}>
              <img
                className="block"
                src={`data:image/png;base64,${image.image_b64}`}
                width={64}
                height={64}
                alt={image.prompt}
              />
              <div className="text-sm">{image.prompt}</div>
            </div>
          ))}
        </div>
      </div>
    </div>
  );
} -
Implement the
onClickhandler, where we will generate the pop art image, as well as saving it to the database. Replace theonClickvariable with the following:const onClick = async () => {
setLoading(true);
if (currentImage) {
addPastImage(currentImage);
setCurrentImage(null);
}
const result = await openai.images.generate({
model: "dall-e-2",
// This is where pop art comes in :)
prompt: currentPrompt + ", in pop art style",
size: "256x256",
// In this example, we simply fetch the images in Base64 and store them in database
// In production application you may want to upload the images to a dedicated store
// such as Supabase Storage or AWS S3
response_format: "b64_json",
});
const newImage = {
prompt: currentPrompt,
image_b64: result.data[0].b64_json!,
};
if (session) {
await supabase.from("generated_images").insert({
image: result.data[0].b64_json!,
prompt: currentPrompt,
user_id: session.user.id,
});
}
setCurrentImage(newImage);
setLoading(false);
};
The ImageGen component is now ready.
View complete source code
"use client";
import { createClient } from "@/utils/supabase/client";
import type { Session, SupabaseClient } from "@supabase/supabase-js";
import OpenAI from "openai";
import { useCallback, useEffect, useMemo, useState } from "react";
const PROJECT_ID = "<Your Project ID>";
function useOpenAI(accessToken: string) {
return useMemo(
() =>
new OpenAI({
baseURL: "https://openai.api.serverlessai.dev/v1",
apiKey: `${PROJECT_ID}:${accessToken || ""}`,
dangerouslyAllowBrowser: true,
}),
[accessToken]
);
}
function useSession(supabase: SupabaseClient) {
const [session, setSession] = useState<Session | null>(null);
useEffect(() => {
(async () => {
const { data: session } = await supabase.auth.getSession();
setSession(session?.session);
})();
}, []);
return session;
}
interface GeneratedImage {
prompt: string;
image_b64: string;
}
function usePastImages(supabase: SupabaseClient) {
// Fetch the images the user has generated before
const [pastImages, setPastImages] = useState<GeneratedImage[]>([]);
useEffect(() => {
(async () => {
const { data: pastImages } = await supabase
.from("generated_images")
.select("*")
.order("created_at", { ascending: false });
if (pastImages) {
setPastImages(
pastImages.map((row) => ({
prompt: row.prompt || "",
image_b64: row.image || "",
}))
);
}
})();
}, []);
const addPastImage = useCallback(
(image: GeneratedImage) => setPastImages((s) => [image, ...s]),
[]
);
return [pastImages, addPastImage] as const;
}
export default function ImageGen() {
const supabase = useMemo(createClient, []);
const session = useSession(supabase);
// We create an OpenAI client with our project's ID, as well as the user's JWT
const openai = useOpenAI(session?.access_token || "");
const [pastImages, addPastImage] = usePastImages(supabase);
const [currentPrompt, setCurrentPrompt] = useState("");
const [loading, setLoading] = useState(false);
const [currentImage, setCurrentImage] = useState<GeneratedImage | null>(null);
const onClick = async () => {
  setLoading(true);

  if (currentImage) {
    addPastImage(currentImage);
    setCurrentImage(null);
  }

  const result = await openai.images.generate({
    model: "dall-e-2",
    // This is where pop art comes in :)
    prompt: currentPrompt + ", in pop art style",
    size: "256x256",
    // In this example, we simply fetch the images in Base64 and store them in database
    // In production application you may want to upload the images to a dedicated store
    // such as Supabase Storage or AWS S3
    response_format: "b64_json",
  });

  const newImage = {
    prompt: currentPrompt,
    image_b64: result.data[0].b64_json!,
  };

  if (session) {
    await supabase.from("generated_images").insert({
      image: result.data[0].b64_json!,
      prompt: currentPrompt,
      user_id: session.user.id,
    });
  }

  setCurrentImage(newImage);

  setLoading(false);
};
return (
<div className="container mx-auto">
<h1 className="text-lg">Pop Art Generator</h1>
<div className="flex items-center">
<input
className="rounded-md h-10 text-sm px-4 py-2 bg-inherit border"
placeholder="Enter your prompt..."
type="text"
value={currentPrompt}
onChange={(e) => setCurrentPrompt(e.currentTarget.value)}
disabled={loading}
/>
<button
className="py-2 px-2 rounded-md no-underline bg-btn-background hover:bg-btn-background-hover"
disabled={!currentPrompt || loading}
onClick={onClick}
>
Send
</button>
</div>
<div>
{currentImage && (
<img
src={`data:image/png;base64,${currentImage.image_b64}`}
alt={currentImage.prompt}
/>
)}
{loading && (
<div className="w-[256px] h-[256px] flex items-center justify-center">
<div>Loading...</div>
</div>
)}
</div>
<div className="mt-4">
<h2>Past Images</h2>
<div className="flex flex-wrap">
{pastImages.map((image, index) => (
<div className="mb-2 mr-2" key={index}>
<img
className="block"
src={`data:image/png;base64,${image.image_b64}`}
width={64}
height={64}
alt={image.prompt}
/>
<div className="text-sm">{image.prompt}</div>
</div>
))}
</div>
</div>
</div>
);
}
Update the Protected Page
In app/protected/page.tsx, update the ProtectedPage component to render the ImageGen component:
import { createClient } from "@/utils/supabase/server";
import { redirect } from "next/navigation";
import React from "react";
import ImageGen from "@/components/ImageGen";

export default async function ProtectedPage() {
  const supabase = createClient();

  const {
    data: { user },
  } = await supabase.auth.getUser();

  if (!user) {
    return redirect("/login");
  }

  return <ImageGen />;
}
Running Your Application
-
Start the Development Server
Run the following command to start the development server:npm run dev -
Access the Application
Openhttp://localhost:3000in your browser. You should see the welcome page. Sign up for a new account using the same email address you used for Supabase, otherwise you might not receive verification code.Now you can start generating pop art images!